


Acrylic earrings have surged in popularity, becoming a staple in modern fashion due to their vibrant colors, lightweight nature, and endless design possibilities. These trendy accessories offer a unique blend of style and functionality, making them a favorite among fashion enthusiasts. However, how to make acrylic earrings at home?
In this article, we will delve into the essential tools and materials needed for crafting them, and provide a comprehensive step-by-step guide to creating your own stunning pieces. Additionally, we will share some creative acrylic earring ideas to inspire your next project. Join us on this colorful journey into the world of acrylic earrings!
Acrylic earrings have become a staple in many jewelry collections due to their numerous benefits:
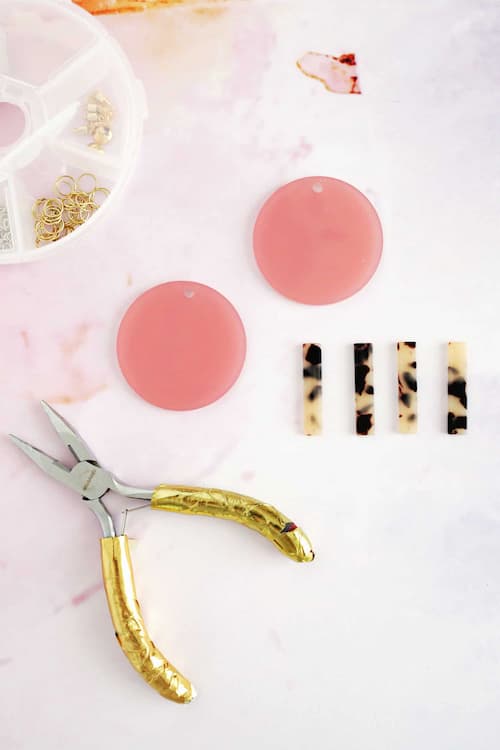
Before you begin crafting your acrylic earrings, you'll need to gather some essential materials and tools:
1. Acrylic Sheets: Available in various colors and patterns, these sheets are the base material for your earrings.
2. Earring Making Kit: Includes hooks, backs, jump rings, and pliers. Hypoallergenic options are available for sensitive ears.
3. Hole Puncher or Hand Drill: Essential for creating holes in the acrylic sheets for attaching hooks.
4. Inkjet Printer (optional): If you plan to add printed designs to your earrings, ensure the ink adheres well to the acrylic.
5. Baking Sheet and Parchment Paper: Used if you need to bake any elements of your design, ensuring they do not stick or melt onto the baking surface.
1. Jewelry Pliers: Essential for opening and closing jump rings, and attaching earring hooks.
2. Needle Files: Used for smoothing the edges of the cut acrylic pieces.
3. Hand Drill or Rotary Tool: For drilling precise holes in the acrylic for jump rings and earring hooks.
4. Scissors or Craft Knife: For cutting shapes from thinner acrylic sheets.
5. Sandpaper: For smoothing and finishing the edges of your acrylic pieces.
Now you can follow these steps to create stunning acrylic earrings that reflect your personal style and creativity.
Begin by finding or creating a design for your acrylic earrings. You can use free images or create your own digital drawings. If you have a Cricut machine, it can be extremely helpful for cutting intricate designs. Upload your images or design from scratch using the Cricut software.
If you want to add printed designs to your earrings, print your designs on shrink plastic film or adhesive vinyl using an inkjet printer. Use the glossy photo paper setting for the best results, and allow the prints to dry completely to avoid smudges.
Carefully cut out your designs with scissors or a craft knife for intricate shapes. Use a hole puncher or hand drill to create holes where needed for attaching earring hooks later.
If you are using shrink film, preheat your oven according to the film’s instructions. Bake the designs on a parchment-lined baking sheet, watching them carefully as they shrink and flatten out.
After cutting or baking, use sandpaper and needle files to smooth out any rough edges on your acrylic pieces. This ensures a professional and comfortable finish.
Once your pieces are ready, attach earring hooks using jump rings and jewelry pliers. Ensure the hooks are securely fastened to prevent them from coming loose.
Your acrylic earrings are now ready to wear! Enjoy showcasing your unique and stylish creations, knowing they are durable and customized to your personal taste.
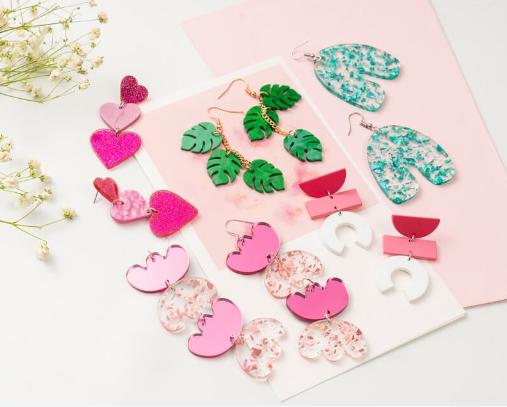
Here are some creative ideas to inspire your acrylic earring designs:
Explore the timeless appeal of geometric shapes such as triangles, circles, squares, and hexagons. Combine different shapes and colors to create modern, eye-catching designs. Layering multiple shapes can add depth and dimension to your earrings.
Draw inspiration from nature with designs featuring leaves, flowers, feathers, or even animal shapes. Use transparent or translucent acrylic to mimic the delicate textures found in nature, adding a touch of elegance to your accessories.
Unleash your inner artist by creating abstract designs with bold colors and irregular shapes. Swirl patterns, splatters, and asymmetrical designs can make each pair of earrings a unique piece of wearable art.
Achieve a sophisticated look with marbled acrylic sheets. The swirling patterns and mix of colors can resemble precious stones or polished minerals, giving your earrings a luxurious appearance.
Customize earrings with monograms or initials for a personal touch. These can be great gifts for friends and family, or a unique way to wear your own name or initials.
Create festive earrings for different holidays and seasons. Think snowflakes for winter, pumpkins for fall, flowers for spring, and suns or seashells for summer. These thematic designs can add a playful and seasonal flair to your collection.
Design large, bold earrings that make a statement. Use vibrant colors, intricate patterns, and oversized shapes to create earrings that stand out. Statement pieces can be a great way to showcase your artistic skills and creativity.
For a more subdued and elegant look, create minimalist designs with simple lines and neutral colors. Thin bars, small discs, and delicate shapes can be perfect for everyday wear and add a touch of sophistication to any outfit.
Combine acrylic with other materials like wood, metal, or resin to create mixed-media earrings. The contrast between different textures and materials can result in unique and intriguing designs.
Incorporate elements from your favorite movies, TV shows, or books into your earring designs. Icons, symbols, and characters can make for fun and recognizable pieces that resonate with fellow fans.
To sum it up, learning how to make acrylic earrings can be both enjoyable and rewarding, whether you're a beginner or an experienced crafter. By following this easy DIY guide, you can explore various techniques of how to make acrylic earrings with Circut. Experiment with different shapes, colors, and patterns to create stunning pieces that reflect your personal style. So start crafting your acrylic earrings today and enjoy the process of making beautiful jewelry that you can wear or gift with pride.
Yes, you can cut acrylic without a laser cutter. For thinner acrylic sheets, you can use a craft knife or scissors. For thicker sheets, a saw or a rotary tool with a cutting attachment works well. Ensure you use appropriate safety measures and tools suitable for the thickness of the acrylic.
No, acrylic earrings are typically lightweight, making them comfortable to wear even in larger sizes. This lightweight nature is one of the many benefits of using acrylic for earring designs, as it doesn’t strain the ears.
It's not recommended to wear acrylic earrings in the shower. While acrylic itself is water-resistant, prolonged exposure to water can weaken the adhesive used for any additional decorative elements and may cause metal findings to tarnish. It's best to remove your acrylic earrings before showering to ensure their longevity.
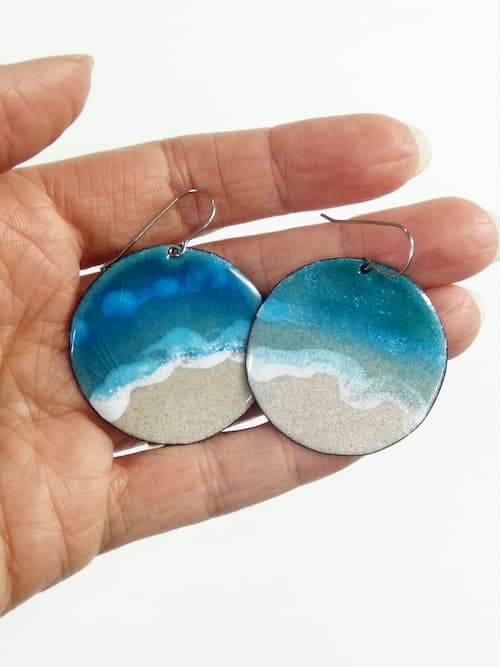
Learn how to make enamel earrings with our step-by-step guide. Discover essential tips, materials & techniques for creating beautiful, custom DIY jewelry at home.
Read More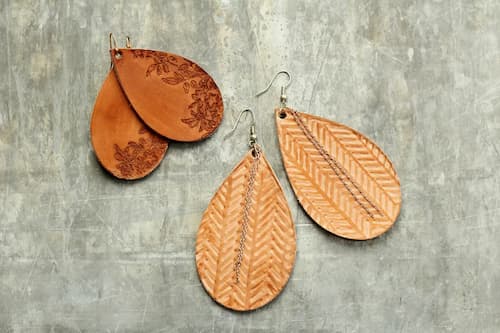
Learn how to make leather earrings with our easy step-by-step guide. Discover tips and materials needed to create stylish, custom leather earrings at home.
Read More
Wondering how to make resin earrings? Perfect for DIY enthusiasts, follow our step-by-step guide to create stunning resin earrings. Start your creative craft now!
Read More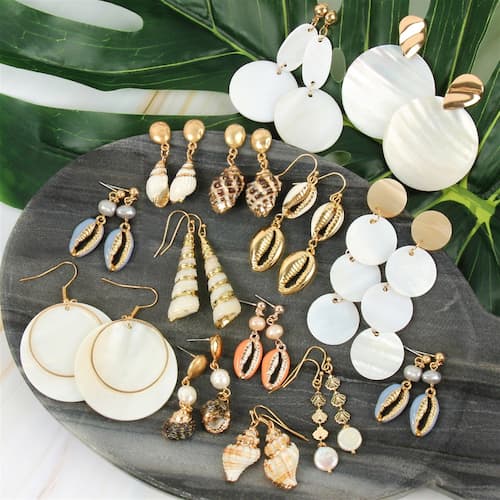
Learn how to make seashell earrings with our step-by-step guide. Perfect for beginners, this DIY tutorial will help you create beautiful, beach-inspired jewelry.
Read More