


Resin jewelry has gained immense popularity in the world of fashion and DIY crafts, offering enthusiasts a unique way to create stunning, personalized pieces. Wondering how to make resin earrings yourself?
This article will delve into the fascinating world of resin jewelry, guiding you through how to make resin earrings with molds or without molds. From gathering the necessary materials and tools to following a detailed step-by-step guide, you'll learn how to make resin rings that reflect your personal style. Whether you're a beginner or an experienced crafter, this comprehensive guide will provide you with all the information you need to start creating resin jewelry masterpieces.
Resin jewelry is made from various types of resin, including epoxy resin, UV resin, and polyester resin. Epoxy resin, the most commonly used, is a liquid that hardens into a clear, shiny, and water-resistant solid. The process of making resin jewelry involves mixing resin with a hardener and pouring it into molds or applying it to components such as metal settings.
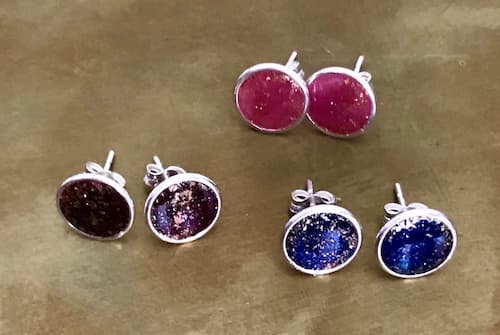
Additionally, artists often embed decorative elements like dried flowers, glitter, or small objects into the resin, which hardens to a clear, glass-like finish. This technique allows for unique, personalized designs and vibrant colors. Resin jewelry is known for its durability, lightweight nature, and the endless creative possibilities it offers, making it a popular choice among DIY enthusiasts and professional jewelers alike.
Epoxy resin and UV resin are both popular materials used in crafting, jewelry making, and various DIY projects. Each type has distinct properties, advantages, and applications. Here’s a comparison of the two:
Comparison of Epoxy Resin and UV Resin
| Aspect | Epoxy Resin | UV Resin |
| Components | Two parts: resin and hardener | Single-component system |
| Curing Process | Requires mixing in a specific ratio | Cures when exposed to UV light |
| Curing Time | Several hours to days | Minutes under UV lamp or sunlight |
| Durability | Strong, durable, resistant to scratches and chemicals | Suitable for thin layers, less durable for thick applications |
| Clarity | Clear, glass-like finish; may yellow over time | Excellent clarity, does not yellow |
| Working Time | Longer working time, allows detailed work | Short working time, precise timing needed |
| Thickness | Suitable for thicker layers and large molds | Better for thin layers and small molds |
| Jewelry Making | Pendants, earrings, larger pieces | Quick fixes, small pieces, top coats |
| Art | Pour paintings, encapsulations, sculptures | Nail art, small decorations |
| Crafts | Coating, sealing surfaces, making coasters | Small decorations, coating surfaces |
Application |
Epoxy resin is versatile and can be used for large and intricate projects. |
UV resin is perfect for small, quick, and detailed work. |
Creating resin earrings is a fun and creative process that allows you to design unique pieces of jewelry. Here’s a detailed guide on how to make a resin ring or earring to help you get started.
Before you begin, gather all the necessary materials and tools. Having everything prepared and within reach will make the process smoother and more enjoyable.
Materials
1. Epoxy Resin and Hardener: Choose a high-quality epoxy resin that cures clear and is suitable for jewelry making.
2. Molds: Silicone molds specifically designed for earrings, which come in various shapes and sizes.
3. Colorants: Resin dyes, pigments, or mica powders to add color to your resin.
4. Inclusions: Decorative items such as glitter, dried flowers, beads, or small charms.
5. Mixing Cups and Sticks: Disposable cups and wooden sticks for mixing the resin and hardener.
6. Earring Findings: Earring hooks, posts, and jump rings for assembling your earrings.
7. Glue: Strong adhesive like E6000 for attaching findings.
8. Protective Gear: Gloves, a mask, and a well-ventilated area to ensure safety while working with resin.
Tools
1. Toothpicks or Needles: For popping air bubbles and placing inclusions.
2. Tweezers: For handling small decorative items.
3. Drill: A small hand drill or pin vise for making holes in the cured resin pieces.
4. Sandpaper: Fine-grit sandpaper for smoothing edges.
5. UV Light (Optional): For curing UV resin, if you choose to use it instead of epoxy resin.
Follow these steps to create beautiful resin earrings:
Step 1: Prepare Your Workspace
Protect your work area from resin spills by covering it with a disposable plastic sheet or wax paper. Ensure the room is well-ventilated and put on your protective gear.
Step 2: Mix the Resin
Follow the manufacturer’s instructions to mix the epoxy resin and hardener. Typically, you will mix equal parts of resin and hardener in a disposable cup. Stir the mixture slowly with a wooden stick to avoid creating air bubbles. Mix until the resin is clear and thoroughly combined.
Step 3: Add Color and Inclusions
Divide the resin into smaller cups if you plan to use multiple colors. Add a small amount of resin dye, pigment, or mica powder to each cup and mix well. If you want to include glitter, dried flowers, or other small items, mix them into the resin now.
Step 4: Pour the Resin into the Molds
Carefully pour the resin mixture into the silicone molds, filling them to the desired level while leaving a small gap at the top to avoid overflow. Use a toothpick or needle to pop any air bubbles that rise to the surface.
Step 5: Cure the Resin
Allow the resin to cure according to the manufacturer’s instructions. This process typically takes 24 to 48 hours. Ensure the molds are placed on a flat, level surface and covered to protect them from dust.
Step 6: Demold and Finish
Once the resin is fully cured, gently remove the pieces from the molds. If there are any rough edges, use fine-grit sandpaper to smooth them out. If your designs require holes for earring hooks, use a small hand drill or pin vise to make the holes.
Step 7: Assemble the Earrings
Attach the earring findings to the resin pieces. Use strong adhesive to attach earring posts or jump rings to the resin. Allow the glue to dry completely before handling the earrings.
Step 8: Final Touches
Inspect your earrings for any imperfections. If necessary, you can add a final coat of resin or a clear varnish to give them a glossy finish.
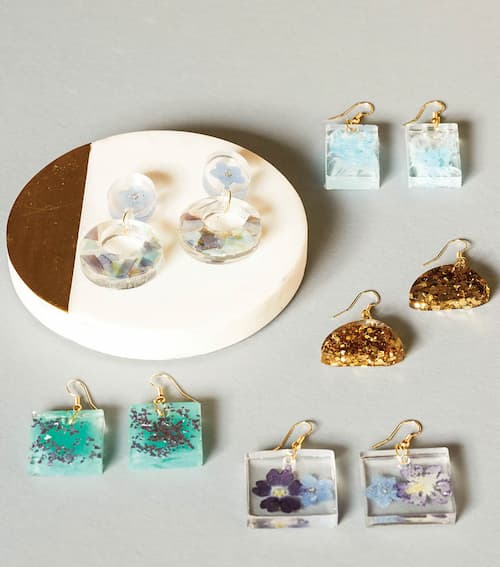
Learning how to make resin earrings and rings is an enjoyable and creative process that allows you to craft unique and stylish pieces. Whether you choose epoxy or UV resin, the steps are straightforward and the results are stunning. With patience and practice, you'll master the art of resin jewelry making and produce beautiful, customized earrings that reflect your personal style. Enjoy the journey of crafting and the satisfaction of wearing your handmade resin earrings!
Yes, resin earrings are generally safe to wear if they are properly cured. However, it's essential to ensure that high-quality, non-toxic resin is used, and any residual chemicals are fully hardened to avoid skin irritation or allergic reactions. Additionally, always purchase resin earrings from reputable sources to ensure safety standards are met.
Absolutely! Making resin jewelry at home is a popular and accessible craft. With the right materials, tools, and a bit of creativity, you can create beautiful resin earrings and other jewelry pieces. Ensure your workspace is well-ventilated and protected from spills.
To keep your resin earrings in good condition, store them in a cool, dry place away from direct sunlight. A jewelry box or a soft pouch is ideal to prevent scratches and dust accumulation. Avoid exposing the earrings to harsh chemicals or extreme temperatures to maintain their appearance and durability.
To make resin rings without molds, use a thick, cylindrical object like a dowel or pipe as a form. Wrap it with non-stick tape or plastic wrap to prevent sticking. Mix and pour the resin over the form, shaping it with tools as it begins to set. Once cured, carefully remove the ring and sand any rough edges for a smooth finish.
Learn how to make seashell earrings with our step-by-step guide. Perfect for beginners, this DIY tutorial will help you create beautiful, beach-inspired jewelry.
Read More
Learn how to display jewelry with our 6 effective methods, including display trays, stands, and more. Showcase your pieces beautifully and enhance your sales!
Read More
Learn how to make Taylor Swift friendship bracelets with our detailed guide. Discover themed ideas and essential tools and follow our step-by-step instructions.
Read More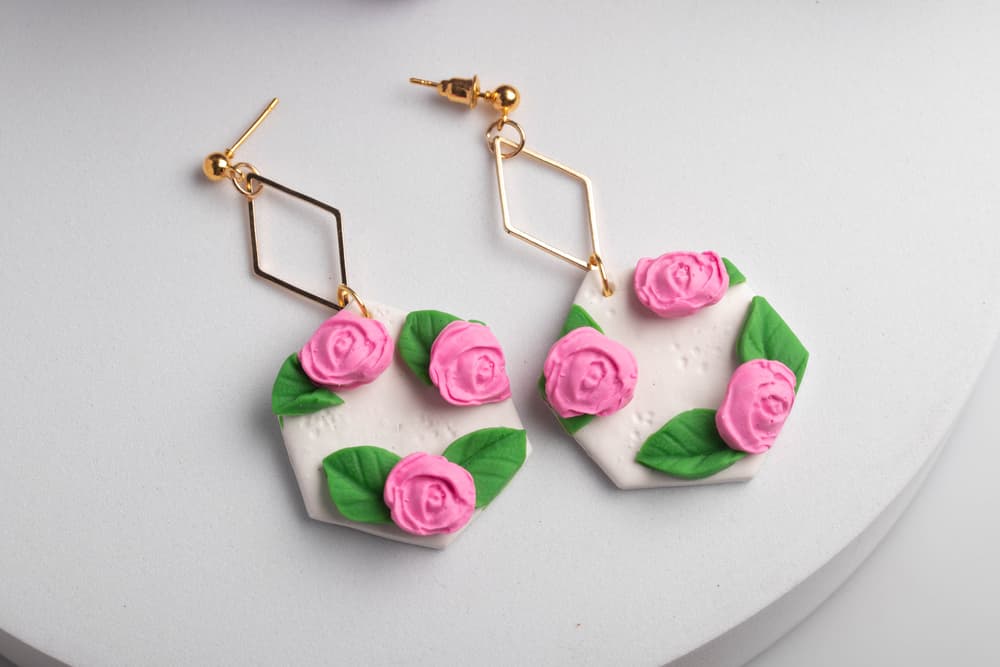
Learn how to make clay jewelry with our DIY guide, from selecting the right materials to mastering the crafting process. Start your creative journey today!
Read More