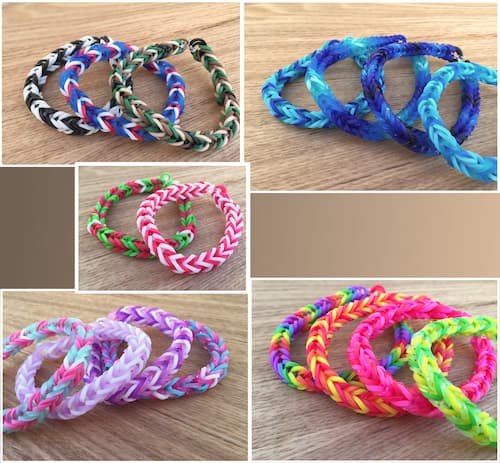
A fishtail bracelet is a stylish woven accessory characterized by its intricate pattern resembling a fishtail. Making it yourself offers a creative outlet, personalization options, and a sense of accomplishment. If you have no idea how to make it, don't worry.
In this article, we'd like to take you on a guided tour of how to make fishtail bracelet. From selecting colors to understanding time investment, we cover every aspect to ensure your fishtail bracelet reflects your unique style and creativity.

Before you learn how to make a fishtail bracelet step by step, it's essential to gather all the materials you'll need. Here's a comprehensive list to ensure a smooth crafting experience:
For the String Fishtail Bracelet:
Creating a fishtail bracelet is a fun and creative activity that allows you to weave colorful patterns with ease, whether using the popular Rainbow Loom or just some string. Follow these simple steps to make a fishtail bracelet by hand:
Step 1: Start the Bracelet
Place your first band in a figure eight shape around two pegs on the edge closest to you.
Place two bands over the pegs on top of the figure right band.
Step 2: Build the Bracelet
Pull the left side of the figure eight (bottom) band over the peg so it's looped over the two top bands. Repeat with the right side of the figure eight. Then place another band over the pegs.
Continue looping the bottom band over the two top ones and then adding a new band on top until you reach the desired length to fit around your wrist. Also, ensure there are always three bands on the pegs.
Step 3: Pulling It Off the Loom
Grab the bracelet at the top by the band looped over the bands on the pegs. Hold that band in place.
Step 4: Remove the Extra Bands and Clip It
Pull out the two extra bands then attach a clip. Then you finish making a fishtail bracelet on the loom.
Step 1: Prepare the Thread:
Organize three forty-inch strands of embroidery floss in five colors (15 total strands).
Step 2: Create a Loop:
Fold the bundle of floss in half and knot it at the top to form a loop. Ensure the loop is large enough to wrap the ends through later to tie it onto your wrist.
Step 3: Sort the Thread:
Separate the thread so that on both the left and right sides, there are three strands of each of the five colors. Keep each color together.
Step 4: Begin the Bracelet:
Start by criss-crossing the first color (bundle of three strands) over to the opposite side.
Step 5: Continue the Pattern:
Keep crossing the same color over from the opposite side.
Step 6: Repeat with Other Colors:
Repeat steps 4 and 5 with the next color. Note that initially, it might not look very pretty.
Step 7: Continue with Each Color:
Repeat steps 4 and 5 with every color, ensuring the floss remains tight and organized.
Step 8: Chevron Pattern Emerges:
As you progress, a beautiful chevron pattern will start to emerge.
Step 9: Braid to Desired Length:
Continue braiding until you reach your desired bracelet length.
Step 10: Stop Braiding:
Once you've reached the desired length, stop braiding.
Step 11: Tie an Overhand Knot:
Secure the bracelet by tying an overhand knot.
Step 12: Trim the Ends:
Leave about 3 inches of floss, then trim the ends. That is how to make a fishtail bracelet with thread.
Making a fishtail bracelet typically takes approximately 10 to 15 minutes to complete. This timeframe can vary depending on factors such as your experience level, the complexity of the design, and the materials you are using. Here’s a better idea of how much time will it take based on your level:
Tips to Expedite the Process:
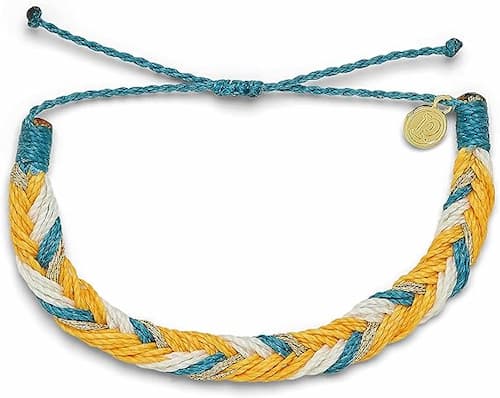
If you are looking for a perfect fishtail braid string bracelet, Pura Vida Fishtail Braid String Bracelet might be the one for you.

Crafted in the spirit of "Pura Vida," these Costa Rican-founded bracelets embody a vibrant lifestyle. Handcrafted worldwide, each Pura Vida piece is a stylish commitment to sustainability, supporting jobs and communities. Versatile day-to-day staples, the bracelets effortlessly mix and match for a beachy or boho look. A gorgeous gold-coated "P" charm enhances the colorful woven bands, standing out on any wrist.
Crafting the perfect fishtail bracelet, whether through the vibrant hues of a Rainbow Loom or the elegant simplicity of string, offers a delightful blend of creativity and style. This guide has walked you through material selection, detailed steps, and even explored the Pura Vida alternative, ensuring you're well-equipped to weave your masterpiece. Remember, the time invested varies, but the joy of wearing or gifting a handmade bracelet is timeless. Embrace this craft and let your creativity shine through each interwoven loop.
The number of strings depends on your desired bracelet thickness. Typically, 4 to 6 strings work well for a standard fishtail bracelet.
Use the adjustable slip tie knot to customize the bracelet's fit. The band can be expanded from 2 to 5 inches in diameter. Here is how to tie a bracelet knot.
You can start with as few as two colors to create a simple, yet striking pattern. However, the beauty of this craft lies in its versatility; you can incorporate multiple colors for more complex and vibrant designs. The choice of colors and the number you use ultimately depend on your personal preference and the desired final look of your bracelet.
Learn step-by-step how to make a rubber band bracelet with our comprehensive guide. Explore creative techniques for personalized and vibrant accessories.
Read MoreDiscover the art of how to read friendship bracelet patterns with our comprehensive guide. Learn step-by-step how to read and create beautiful designs effortlessly.
Read MoreLearn how to make a blessing bracelet with our step-by-step guide, covering material selection, knotting techniques, and top recommendations for your creation!
Read MoreLearn how to make a chevron bracelet with our easy-to-follow tutorial. Master the art of bracelet crafting and design your own unique accessories at home.
Read More