Blessing bracelets have become more than just accessories; they symbolize gratitude and positive affirmations. Making your own blessing bracelet adds a personal touch, allowing you to infuse positive energy into every knot.
This comprehensive guide will take you through the process of how to make a blessing bracelet, from selecting the right materials to knotting techniques and finishing touches. Plus, we'll spotlight an exceptional blessing bracelet option to inspire your journey. Read on!

Here's a detailed guide on selecting materials for making blessing bracelets:
With your supplies ready to make a Blessing Bracelet, this detailed guide will walk you through the process step by step, ensuring you have all the necessary information and techniques to craft your own Blessing Bracelet.
Step 1: Measure and Cut the Cord
Measure the cord by wrapping it loosely around your wrist, ensuring it's not too tight. Add a few extra inches for knots and adjustments. Cut the cord accordingly.
Step 2: String the Beads
On how to make a blessing bracelet with beads, thread the beads onto the cord in the desired pattern. Experiment with colors and arrangements to make it visually appealing and meaningful to you.
Step 3: Add Charms and Accents
Integrate your chosen charms and metallic accents into the bracelet. This step allows you to personalize the bracelet and infuse it with your unique energy.
Step 4: Begin Knotting
Start tying knots between each bead to secure them in place. You can use simple overhand knots or get creative with various knotting techniques. Ensure the knots are tight enough to hold the beads securely.
Step 5: Integrate Charms into Knots
Incorporate your charms seamlessly into the knots as you progress. This not only ensures a secure fastening but also adds a beautiful touch to your Blessing Bracelet.
Step 6: Finish with a Secure Knot
Once you've reached the desired length, finish the bracelet with a secure knot. You can tie multiple knots for added security.
Step 7: Trim Excess Cord
Trim any excess cord, leaving a small tail. Be cautious not to cut too close to the knot to prevent unraveling.
Step 8: Personalize with a Tag or Note ( Optional )
Add a personal touch by attaching a tag or a small note expressing the intentions or blessings associated with the bracelet. Now you’re done with how to make a prayer bracelet basic tutorial.
Perfecting the knotting techniques and adding thoughtful finishing touches are essential steps in making a blessings bracelet. Here's a guide to help you achieve a polished and meaningful final result:
Knotting Techniques
Finishing Touches Ideas
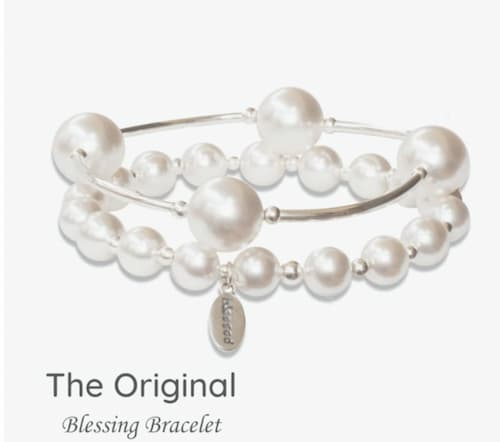
For those seeking the finest piece, consider the "White Pearl Blessing Bracelet" from "Made as Intended." This particular bracelet stands out as a premier choice, epitomizing the essence of the Blessing Bracelet crafted by the brand. Its allure lies in the classic sophistication emanating from the use of Sterling Silver and 12mm White Simulated Crystal Pearls.

Available in standard and larger sizes, accommodating wrists up to 7 inches and 8 inches, it effortlessly transitions from a standalone statement piece to a captivating addition in a stacked ensemble.
Each bracelet is meticulously presented in an embossed gift box, complete with a blank notecard, ribbon, and the distinctive Blessing Bracelet tag, transforming it into a thoughtful and comprehensive gift.
As a top-selling item, its widespread appeal establishes it as an ideal choice for personal adornment or a heartfelt gift, emphasizing the brand's commitment to delivering a meaningful experience.
Learning how to make a blessing bracelet is a fulfilling and creative process. Whether you choose to make one for yourself or as a gift, the positive energy infused in each knot and bead adds a special touch. What’s more, consider the Blessing Bracelet by Made as Intended for a ready-made option that combines elegance with a meaningful message of gratitude.
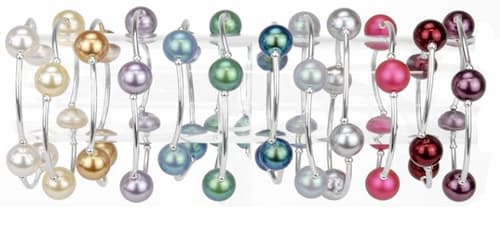
Pearl beads are an excellent choice for a blessing bracelet, symbolizing purity, wisdom, and tranquility. Their natural luster and timeless elegance add a touch of sophistication, while their variety in colors and sizes allows for personalization, making each bracelet a unique and meaningful piece of jewelry.
The standard size of the "Blessing Bracelet" fits wrists up to 7.25 inches, while the larger size accommodates wrists up to 8.25 inches.
Learn how to make a chevron bracelet with our easy-to-follow tutorial. Master the art of bracelet crafting and design your own unique accessories at home.
Read MoreLearn how to open PANDORA bracelet using simple but effective techniques. Discover ways to open different types of claps in PANDORA bracelets.
Read MoreWanna learn how to make an adjustable bracelet using inexpensive materials? We’ll teach you how to make one that you can wear or give as a present.
Read MoreLearn how to make a paracord bracelet with our ultimate guide, covering tools, measuring, setup, weaving patterns, and finishing techniques for your DIY accessory.
Read More