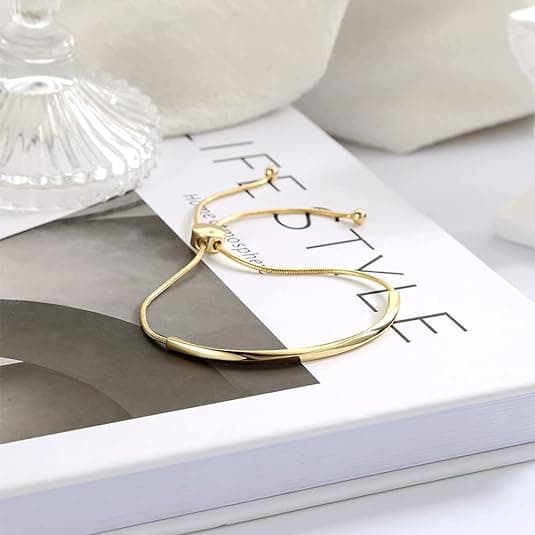
An adjustable bracelet holds significant appeal due to its versatility and personalized fit. Creating an adjustable bracelet is not just about crafting a piece of jewelry; it offers the satisfaction of making bespoke jewelry that aligns with personal style choices.
If you are interested in making an adjustable bracelet, you come to the right place. This article will cover everything from selecting the right tools and materials to providing step-by-step instructions and care advice, ensuring you can craft a piece that not only fits well but also elevates your style with a handmade touch.

The first thing you should do when you want to make an adjustable bracelet is to gather all of the tools and materials first. Doing so will fast-track the whole process as you have everything in one place when you start working on it.
These are some of the things that you should gather before starting your DIY project:

If you prefer a textured look, making an adjustable braided bracelet is your go-to. Braiding combines different strands to create a sturdy and stylish bracelet. You can use leather, yarn, or even thin strips of fabric. Follow these step-by-step process if you want to make an adjustable bracelet:

Once you've mastered how to make an adjustable string bracelet, it's important to know how to maintain its durability and appearance. Below, we'll share some essential tips to ensure your adjustable bracelets remain in pristine condition for years to come:
For those interested in a more specific design, making an adjustable friendship bracelet brings a personal touch to a timeless gift. But if you want to look for a pre-made adjustable bracelet that reflects your elegant style, here’s our recommendation - The WOWORAMA Adjustable Bracelets for Women, which is the perfect friendship bangle for the classy women out there.
This gold slider bracelet allows the user to adjust the link’s length freely. Hence, you can be sure that it will fit any wrist without needing any type of measurement.
It’s made from brass and copper with a rope-type chain with a brilliant finish. This 14K gold plated slider bracelet is also hypoallergenic and is meant for comfortable and long-lasting wear.
Moreover, it’s also affordable and a great gift during special occasions such as birthdays, Mother’s Day, Christmas, and Valentine’s Day.

Learning how to make an adjustable bracelet is one of the best ways to get started on DIY projects and improve your creativity. It might be simple for some, but it can be useful on many occasions especially if you want to give the bracelet to someone important. Furthermore, you can even make a business out of it once you’ve honed your skills.
If you don’t want to go through the hassle of making an adjustable bracelet from scratch, you can always buy one online. Just make sure that the item you choose fits your personality or that of the person receiving it.
Absolutely! Creating an adjustable bracelet as a gift is a thoughtful and personal gesture. It shows you invested time and effort into making something unique for someone special. These bracelets can match the recipient's style and preferences, making them a versatile and appreciated present. Plus, the adjustable design ensures a perfect fit, removing any guesswork about size. It's a heartfelt way to show you care.
The best type of cord for an adjustable bracelet combines durability with comfort. Nylon, hemp, cotton, and satin cords are popular choices. Nylon is strong and withstands wear and tear, making it ideal for everyday use. Hemp offers a natural look and is eco-friendly. Cotton cords are soft and comfortable, while satin cords add a touch of shine and smoothness. Consider the bracelet's style and use when choosing your cord.
Yes, you can add decorations to your adjustable bracelet to make it even more unique. Beads, charms, and even small pendants can personalize your bracelet. Choose decorations that reflect your interests, memories, or the bracelet's intended style. Ensure the decorations fit the cord and adjust smoothly without hindering the bracelet's functionality. Adding decorations is a great way to express creativity and make your bracelet truly one-of-a-kind.
Learn how to make a paracord bracelet with our ultimate guide, covering tools, measuring, setup, weaving patterns, and finishing techniques for your DIY accessory.
Read MoreLearn how to make a bra strap bracelet with our easy guide, covering materials, steps, customization, best replacements, and maintenance tips.
Read MoreLearn how to clean PANDORA bracelet with our easy guide. Discover tips for maintaining sparkle and preventing tarnish, keeping your bracelet beautiful.
Read MoreGet started on your jewelry crafting journey with easy steps on how to make a bracelet for beginners, plus advanced techniques for unique creations.
Read More