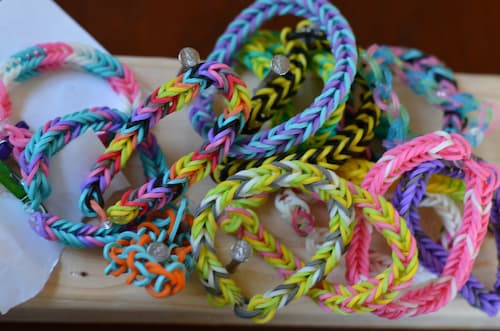
A rubber band bracelet is a vibrant, handcrafted accessory made from interwoven elastic bands. Symbolizing friendship and creativity, these bracelets are easily customizable. Creating one involves looping and layering rubber bands with simple tools, making it a fun and accessible craft for all ages.
This ultimate guide is your doorway to creating colorful, stretchy accessories that can be as unique as your imagination allows. From gathering the essential supplies to mastering the basics, we'll guide you through every step of crafting your very own rubber band bracelets. Start your creative adventure today!

To make a rubber band bracelet, you'll need the following tools and materials:
Tools:
Materials:
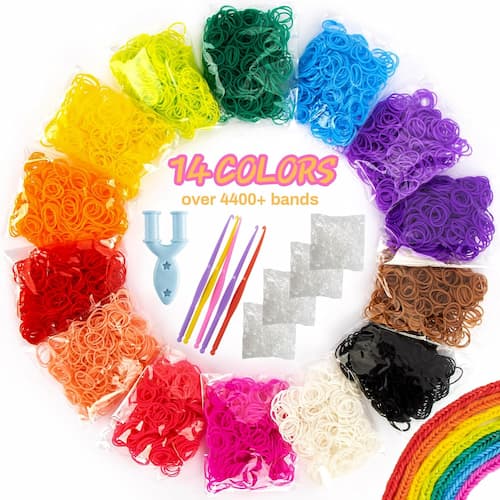
Crafting a rubber band bracelet requires essential tools as we mentioned above. For a convenient and comprehensive solution, consider the "Rubber Band Bracelet Kit Bracelet," which includes everything you need, such as over 4400 vibrant rubber bands, hooks, essential accessories and an instruction manual, to create stunning bracelets with ease and precision, making it suitable for both beginners and experienced crafters alike.
Now that you have all the tools and materials ready, it’s time to follow these simple steps to make a bracelet out of rubber bands by yourself.

Step 1: Choose Your Colors
Select the rubber bands you want to use for your bracelet. You can use a single color, create a pattern, or mix and match for a more vibrant look.
Step 2: Set Up the Loom or Hook
Step 3: Start the Base
Place the first rubber band on the loom pegs or hook, creating a figure-eight shape. This will serve as the base for your bracelet.
Step 4: Add More Bands
Continue adding rubber bands in a chain, one on top of the other. You can stick to a single color or create a pattern by alternating colors.
Step 5: Create the Design
Follow the specific pattern you want for your bracelet. If using a hook, continue adding rubber bands until you reach the desired length.
Step 6: Connect the Ends
Once you've reached the desired length, use a C-clip or S-clip to connect the two ends of the bracelet. If you're using a loom, carefully remove the bracelet from the pegs.
Step 7: Finishing Touches
Adjust the bands to ensure they're evenly distributed and tug on the edges gently to tighten the bracelet. Trim any excess bands if necessary.
Looking for a rubber band bracelet kit for you and your kid? The IFUCTYE Rubber Band Bracelet Kit offers everything kids need for hours of creative fun, with 15,000 rubber bands in 25 colors, beads, pendants, and various tools. This kit not only organizes easily in a three-layer container but also promotes fine motor skills, color recognition, and hand-eye coordination. Perfect for gifts and group activities.
Once you've mastered the basics of how to make a bracelet with rubber bands, dive into advanced tips and techniques to elevate your rubber band bracelet game.
1. Advanced Loom Techniques:
Explore intricate patterns like the "starburst," "hexafish," or "zippy chain" on a rubber band loom. These patterns involve more complex weaving and yield impressive, detailed designs. Refer to advanced loom tutorials for step-by-step instructions.
2. Inverted Fishtail Variation:
Take the traditional fishtail pattern to the next level by experimenting with inverted fishtail variations if you know how to make a bracelet with rubber bands by hand. This technique involves reversing the weaving process, creating a distinctive and visually appealing bracelet.
3. Combining Multiple Weaving Techniques:
Combine different weaving techniques within a single bracelet. For example, integrate a fishtail pattern with a double or triple banding technique to create a multi-dimensional and textured design.
4. 3D Effects with Layering:
Experiment with layering and stacking to create 3D effects in your bracelets. Incorporate bands of varying lengths and thicknesses to add depth and dimension to your designs.
5. Custom Bead Embedding:
Enhance your bracelets by embedding beads directly into the rubber bands during the weaving process. Plan the placement of beads to form patterns or add accents, creating a customized and stylish accessory. For a detailed guide, refer to the easy instructions on how to make a rubber band bracelet with beads.
Engaging in the craft of how to make a rubber band bracelet is not only delightful but also a fulfilling pastime that provides an avenue for expressing your creativity. The process of selecting vibrant colors, experimenting with various patterns, and mastering intricate weaving techniques becomes a therapeutic and enjoyable journey.
Typically, you'll need around 40 rubber bands to make a bracelet. However, the number may vary depending on the bracelet's size and complexity. The IFUCTYE kit provides an ample supply of rubber bands, ensuring you have more than enough for multiple projects.
Yes, you can create rubber band bracelets without a loom using alternative methods like the finger or fork technique. However, the IFUCTYE kit's loom simplifies the process for a more efficient and enjoyable experience.
Rubber band bracelets made with quality materials, such as those in the IFUCTYE kit, are durable and long-lasting. Proper care and maintenance will ensure your creations withstand daily wear.
Discover the art of how to read friendship bracelet patterns with our comprehensive guide. Learn step-by-step how to read and create beautiful designs effortlessly.
Read MoreLearn how to make a blessing bracelet with our step-by-step guide, covering material selection, knotting techniques, and top recommendations for your creation!
Read MoreLearn how to make a chevron bracelet with our easy-to-follow tutorial. Master the art of bracelet crafting and design your own unique accessories at home.
Read MoreLearn how to open PANDORA bracelet using simple but effective techniques. Discover ways to open different types of claps in PANDORA bracelets.
Read More