


Earrings are a cherished accessory for many, adding a touch of elegance and personality to any outfit. However, accidents happen, and earrings can break. Instead of discarding your beloved pieces, you can learn how to fix them with a few simple tools and techniques. In this guide, we will walk you through understanding common types of earring damage, how to fix a broken earring, and tips for preventing future earring damage. Join us to start the journey of restoring your loved earrings.
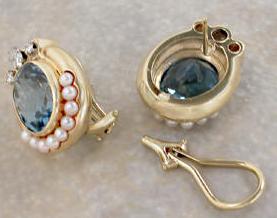
Before diving into the repair process, it's essential to understand the different types of damage that earrings can sustain. This knowledge will help you identify the best repair method for each specific issue.
Now that we understand the common types of earring damage, let's explore how to fix them and restore them to their former glory. Whether it's a missing back, a broken clasp, or a detached post, knowing how to fix a broken earring can save you money and keep your favorite pieces wearable.
First, carefully examine the broken earring to understand the extent of the damage. Identify the type of repair needed—whether it's reattaching a post, fixing a clasp, or replacing a missing part. Having a clear idea of what needs to be done will help you gather the necessary tools and materials.
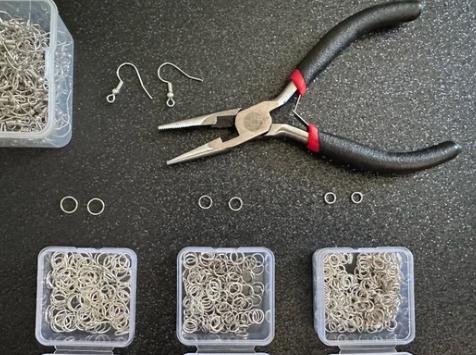
Depending on the type of damage, you'll need specific tools and materials. Common items include:
Jewelry pliers
Super glue or jewelry adhesive
Replacement earring backs, posts, or hooks
A small file
Tweezers
A magnifying glass (optional)
Before you start the repair, clean the broken pieces to ensure a strong bond. Use a soft cloth or a cotton swab dipped in rubbing alcohol to remove any dirt, oil, or residue. Let the pieces dry completely before proceeding.
If the post or hook is broken, you’ll need to replace it. Use jewelry pliers to remove any remnants of the old post or hook. Apply a small amount of jewelry adhesive to the new post or hook, then carefully attach it to the earring. Hold it in place for a few seconds to ensure a strong bond. Allow the adhesive to dry according to the manufacturer’s instructions.
For earrings with a broken clasp, use jewelry pliers to open the jump ring connecting the clasp to the earring. Remove the damaged clasp and replace it with a new one. Use the pliers to close the jump ring securely. Make sure the clasp functions properly before wearing the earring.
If your earring is missing parts such as backs or beads, find suitable replacements. For earring backs, simply slide the new back onto the post. For decorative parts like beads or charms, use pliers to attach them securely, ensuring they match the original design.
Once the repair is complete, inspect the earring for any loose parts or weak spots. Use a small file to smooth any rough edges or excess glue. Give the earring a final clean to remove any fingerprints or residue.
Before wearing your repaired earring, gently test it to ensure it’s secure. Attach it to your ear and check for comfort and stability. If it feels loose or unstable, reinforce the repair as needed.
While it's helpful to know how to fix broken earrings, preventing damage in the first place is even better. Here are some tips to keep your earrings in excellent condition:
Store earrings in separate compartments or pouches with soft linings to avoid scratches and abrasion. Use a jewelry box with individual sections or a hanging organizer for dangle and hoop earrings to keep them untangled and undamaged.
Clean earrings with mild soap or specialized cleaner using a soft-bristled brush to remove dirt. Avoid harsh chemicals and ensure they are thoroughly dried before storage to prevent tarnishing and metal corrosion.
Remove earrings before exposure to chemicals, cosmetics, water, and sweat to prevent damage and discoloration. Apply makeup and perfume before putting on earrings to minimize contact with harmful substances.
Handle earrings with clean, dry hands to avoid transferring oils and dirt. Ensure backings are secure but not overtightened, and be careful not to drop earrings to prevent bending or losing stones.
Regularly inspect earrings for wear and damage, and take them to a professional jeweler for periodic cleaning and repairs. Ensure prongs are secure and not worn down to prevent stone loss.
Fixing a broken earring is a straightforward process that can save you the cost of professional repairs and extend the life of your favorite jewelry pieces. By understanding the common types of earring damage and following the step-by-step guide on how to fix a broken earring that we provided, you can easily restore your earrings to their former glory. Additionally, taking preventive measures can help keep your earrings in excellent condition, reducing the likelihood of future damage.
Yes, earring posts can often be fixed. If the post is bent, you can gently straighten it with needle-nose pliers. If it is broken, you can replace it by removing the old post and attaching a new one with jewelry glue.
The cost to fix a broken earring can vary depending on the type of damage and whether you do it yourself or hire a professional jeweler. DIY repairs typically only cost a few dollars for materials like replacement posts or hooks and jewelry glue. Professional repairs can range from $20 to $50 or more, depending on the complexity of the repair.
Whether it is worth repairing a cheap earring depends on its sentimental value and the cost of the repair. If the earring holds sentimental value or if the repair cost is minimal, it can be worth fixing. However, for very inexpensive earrings, it might be more practical to replace them.
To find lost earrings, retrace your steps and search common areas methodically, using a flashlight and listening for metallic sounds. Check clothing, accessories, and unusual places, using a magnet if applicable. Lastly, you can utilize technology like metal detectors and enlist help.
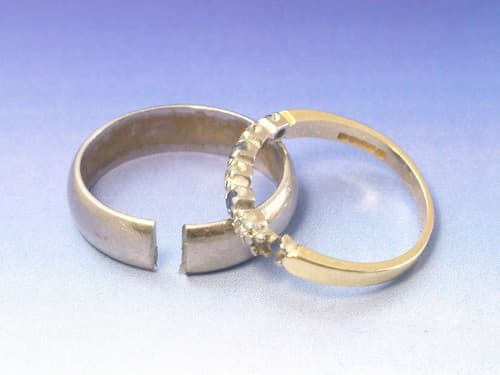
Learn how to fix a broken ring with our step-by-step guide. Discover easy DIY methods and professional repair tips to restore your ring to its original beauty.
Read More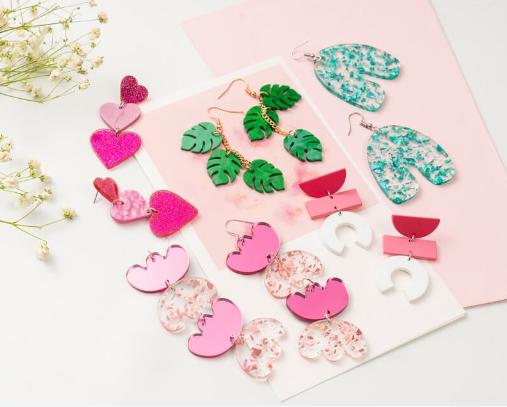
Learn how to make acrylic earrings with our easy step-by-step guide. Discover tips, tools & techniques to create beautiful, custom DIY acrylic earrings at home.
Read More
Learn how to make enamel earrings with our step-by-step guide. Discover essential tips, materials & techniques for creating beautiful, custom DIY jewelry at home.
Read More
Learn how to make leather earrings with our easy step-by-step guide. Discover tips and materials needed to create stylish, custom leather earrings at home.
Read More