


Crafting jewelry at home has never been more accessible or enjoyable, particularly when it comes to creating elastic beaded bracelets. These charming accessories are not only customizable but also serve as perfect gifts or personal keepsakes. This blog explores the essential materials and tools you'll need to get started, ensuring your crafting journey is as smooth as possible. We will guide you through each step, from selecting the right beads to the final assembly of your bracelet. By the end of this article, you'll master how to tie an elastic beaded bracelet, empowering you to enhance your jewelry-making skills with confidence.
To know how to tie an elastic bead bracelet, you should gather the following materials first:
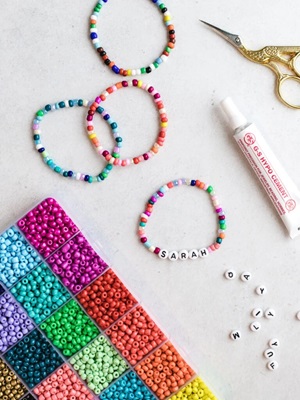
Below is a step-by-step guide that will help you know how to tie an elastic bead bracelet.
Step 1: Choose your beads and cord
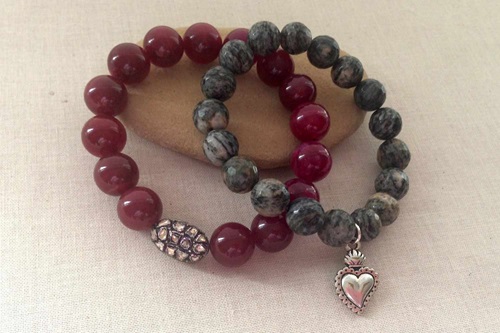
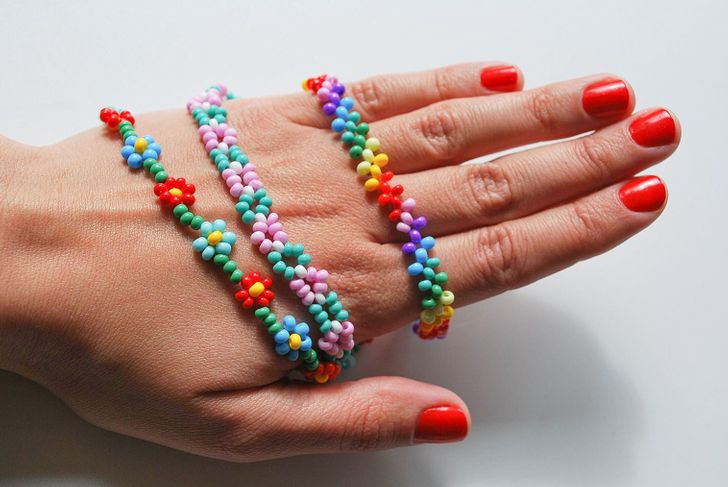
Select beads that complement each other in terms of color, size, and shape. You can use a single type of bead or mix different types for a unique look. Also, choose an elastic cord that is suitable for beading. The cord should have enough stretch to comfortably fit over your wrist but also be strong enough to hold the beads securely in place.
Step 2: Measure and cut the cord
To determine the length of the cord you need, wrap the elastic cord around your wrist and add approximately 1 inch to allow for tying the ends together. Cut the cord to the desired length using scissors. It's always better to cut the cord slightly longer than you think you'll need, as you can always trim any excess later.
Step 3: Prepare your workspace
Lay a beading mat or towel on your workspace to prevent beads from rolling away. This will keep your beads organized and make the beading process easier.
Step 4: Thread the needle (optional)
If you are using a beading needle, thread it onto one end of the elastic cord. This will make it easier to string the beads onto the cord. However, if your beads have large enough holes, you can skip this step and thread the cord directly through the beads.
Step 5: String the beads
Start stringing the beads onto the elastic cord in the desired pattern. If you are using a beading needle, insert the needle through the hole of each bead and push it down to slide the bead onto the cord. If you are threading the cord directly through the beads, simply slide each bead onto the cord, one by one. This process is a crucial part of how to bead a bracelet with elastic, ensuring that your design comes together seamlessly and beautifully. Make sure to maintain the pattern as you add each bead, checking for consistency and spacing to achieve the desired aesthetic.
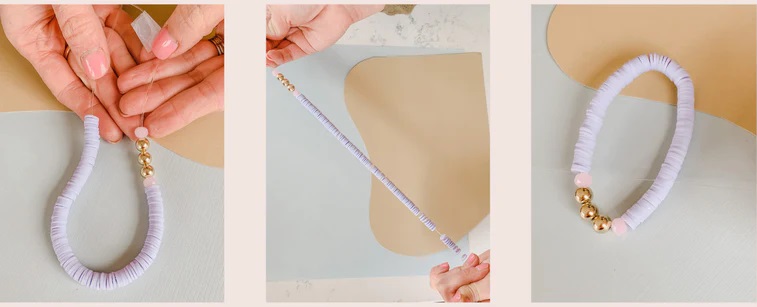
Step 6: Test the length
Once you have strung all the beads onto the elastic cord, wrap the bracelet around your wrist to check if the length is appropriate. You should have a slight resistance when pulling the cord, but it shouldn't be too tight. If necessary, adjust the number of beads or add/remove beads to achieve the desired fit. You can refer TIGERSTAR Elastic Beads Bracelet to know the ideal length. With this, you are almost learned how to make a bracelet with beads and elastic.
Step 7: Tie a secure knot
To secure your bracelet, tie a secure knot at the ends of the elastic cord. Make a simple knot by crossing the two ends of the cord over each other and pulling them through the loop created. Pull the knot tight to ensure it is secure. Repeat this process once or twice to create a double or triple knot for added security. This is a vital step in how to tie off a bead bracelet.

Step 8: Hide the knots (optional)
You can also hide the knots inside a bead. Choose a larger bead with a larger hole and thread both ends of the elastic cord through it. Slide the bead down to cover the knots, concealing them inside. This will give your bracelet a more professional look.
Step 9: Trim any excess cord
Once you have secured the knot, trim any excess elastic cord using scissors. Leave a small tail, approximately 0.5 to 1 inch, to ensure the knot doesn't come undone over time. This small extra length acts as a safety buffer, helping maintain the integrity of your bracelet during wear.
Step 10: Test the bracelet's durability
Before wearing your newly made elastic beaded bracelet, give it a gentle tug to ensure that the knot is secure and won't come undone easily. If the bracelet feels loose or you notice any weak spots, untie the knot and retie it, making sure it is tight and secure.
After mastering the basic techniques on how to tie an elastic beaded bracelet, you might want to explore specific examples for inspiration. The Merdia Elastic Bead Bracelet serves as an excellent reference. Crafted with Tiger eye and black agate stones, it features a carved Loong design for timeless style. Lightweight and comfortable, with a polished yellow color and 14mm beads, this bracelet is suitable for men of all ages. Available in lengths of 7.6", 8.6", and 9.5", it can be worn solo or layered. Durable for everyday use, it’s a great gift for Father's Day and a staple in any men’s jewelry collection.
In summary, creating your own elastic beaded bracelet involves a blend of creativity and precision. Equipped with the right materials and a clear understanding of the process, anyone can master this craft. By following the guidelines outlined above, you can ensure your bracelet is both stylish and durable. Remember, the key to a successful project lies in careful planning and execution. For those looking to further refine their skills, consider exploring various bead patterns and experimenting with different types of elastic. Now that you know how to tie an elastic beaded bracelet, you're ready to start creating beautiful, handmade jewelry that reflects your personal style.
The best knot for elastic bracelets is the surgeon's knot. This knot is strong and secure, ideal for ensuring that the beads stay in place. To tie a surgeon's knot, overlap the ends of your elastic, then wrap one end around the other twice before pulling it through the created loop. Tighten by pulling both ends while holding the beads close to the knot.
To ensure your elastic beaded bracelet fits perfectly, measure your wrist before cutting the elastic, adding an extra inch or two for the knots and adjustment. String the beads, periodically checking the fit by wrapping the bracelet around your wrist. This allows you to add or remove beads as needed before tying the final knot.
To fasten an elastic bead bracelet, simply tie the ends together after stringing your beads. The recommended method is using a surgeon’s knot for added security. After tying the knot, apply a small amount of clear nail polish or glue to the knot to prevent it from loosening or unraveling, then trim the excess elastic close to the knot once dry.
Learn how to make a rubber band bracelet with beads in this simple step-by-step guide. Perfect for DIY crafters and jewelry lovers!
Read More
how to make braided bead bracelets with this step-by-step guide. Perfect for beginners seeking a stylish DIY jewelry project!
Read More
Discover the best types of beads for bracelets and enhance your jewelry making skills with our expert guide!
Read More
Learn how to make a bead cuff bracelet with this guide. Find essential materials, detailed instructions, and customization tips for a unique accessory.
Read More