


Discover the art of crafting your own jewelry with our comprehensive guide on how to make braided bead bracelets. This tutorial will equip you with all the necessary materials and provide a detailed, step-by-step process to create your own beautiful braided bead bracelets. Perfect for personal wear or as thoughtful gifts, these bracelets combine elegance with a touch of personal flair. Keep reading to unleash your creativity and start crafting your unique jewelry pieces today!
To create a beautiful braided bead bracelet, you'll need a few essential materials.
Cord: First, you'll need embroidery floss or other thin, strong cord in the colors of your choice.
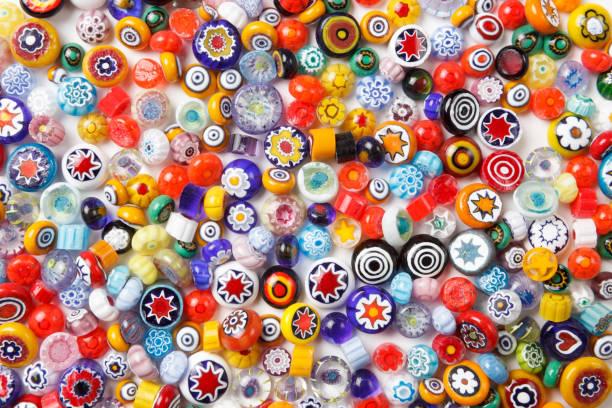
Beads: Beads in various shapes and sizes will also be necessary. They can be glass, wood, metal, or any other bead type that suites your needs.
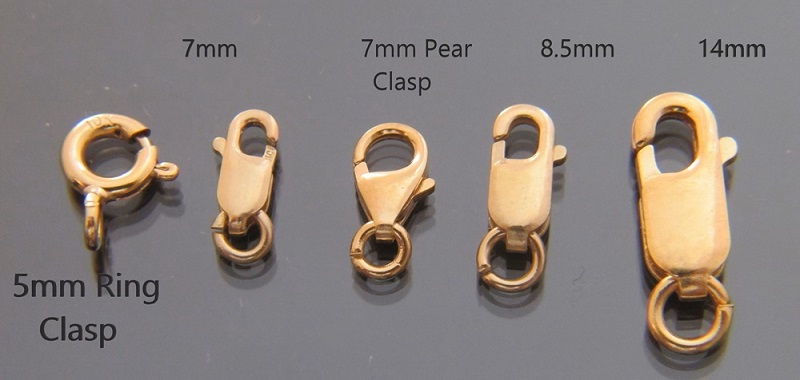
Clasp: You will also need a clasp on hand to secure the bracelet, as well as scissors to trim the cord.
Tape: A tape or bead stopper can help hold the beads in place as you braid.
Flat surface: Lastly, you will need a flat surface to work on and good lighting will make the process easier.
With these essential materials, you're well-equipped to create a unique and personalized braided bead bracelet that reflects your artistic vision and style. Enjoy the process of bringing your creative ideas to life!
Knowing how to braid a bracelet with beads is a fun and creative process that allows you to express your personal style. Follow this step-by-step simple guide to create your own beautiful braided bead bracelet:
Step 1: Measure and Cut the Cord
Using your tape measure, determine the length of your bracelet. A standard bracelet is typically about 7 to 8 inches long. Add extra length for tying knots and adjustments, about 12 inches extra. Cut three strands of your chosen thread or cord to this length.
Step 2: Secure the Strands
Tie the three strands together at one end using a secure knot, leaving a short tail. Attach the knotted end to a stable surface with tape or a clipboard to hold it steady as you braid.

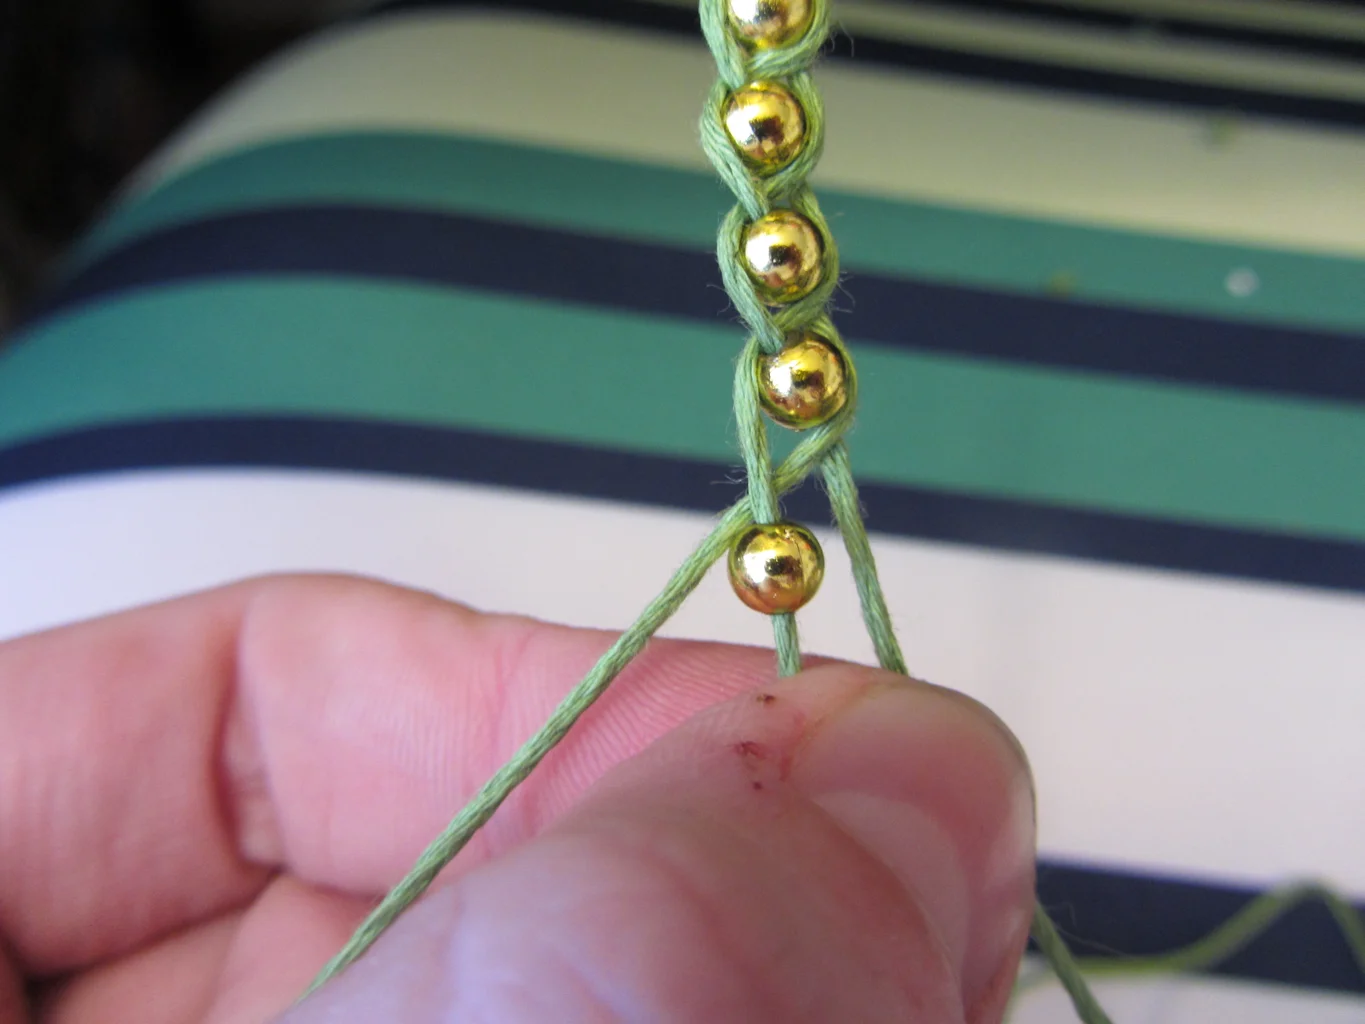
Step 3: Start Braiding
Begin braiding the three strands. After a few basic braids, start incorporating beads into your design. Slide a bead onto the center strand, let it fall to the base of the braid, and continue braiding. Keep adding beads at regular intervals based on your design preference. The beads should sit snugly within the braids.
Step 4: Check the Fit
Periodically wrap the bracelet around your wrist to check the fit. This will help you determine if you need to add more beads or adjust the length of the braids.
Step 5: Finish the Braid
Once you reach the desired length, finish off with several unadorned braids. Tie off the end with another secure knot. Trim any excess cord, leaving enough length to attach the clasp.
Step 6: Attach the Clasp
Attach a jump ring to one end of the bracelet and the clasp to the other. Use your scissors or a pair of pliers to open and close the jump rings securely.
Step 7: Final Adjustments
Make any final adjustments to ensure the bracelet fits comfortably on your wrist. You might want to add or remove beads for a perfect fit.
With this detailed process, you now know how to put beads on a braided bracelet and create unique & personalized braided bead bracelets to wear or give as gifts.
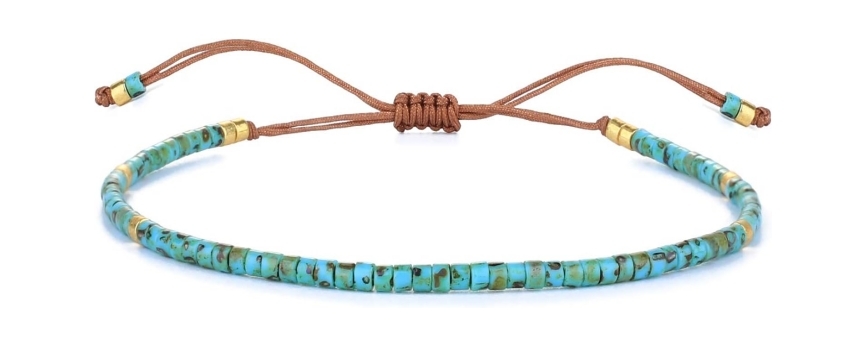
After mastering the art of making a braided bead bracelet, you can explore more intricate and vibrant designs. A perfect example is the KELITCH Seed Beads Strand Bracelet. This handcrafted piece showcases a stunning array of seed beads, offering a dazzling mix of colors that can complement any outfit. The fine detail and delicate craftsmanship make it not only a fashionable accessory but also a piece of art that reflects personal style and creativity. Whether for casual wear or special occasions, the KELITCH Seed Beads Strand Bracelet is an excellent way to bring a touch of sophistication and individuality to your jewelry collection.
Creating beautiful and durable braided bead bracelets requires not only creativity but also precision and some insider know-how. Here are some essential tips to ensure your braided bead bracelets come out looking great and lasting long:
Preparation is Key: Before you start braiding, lay out your beads and tools. Pre-thread your beads if your design permits, and ensure you have enough thread to complete the bracelet without adding more midway, which can weaken the bracelet.
Maintain Even Tension: Consistent tension is crucial in braiding bead bracelets. Uneven tension can lead to a lopsided bracelet or one where the beads are unevenly spaced. Practice maintaining a steady hand and check your tension regularly.
Use a Bead Mat: A bead mat will not only keep your beads from rolling around but also provide a good contrast against your beads and threads, making it easier to work and spot any mistakes.
Keep Your Pattern Consistent: Whether you’re following a specific pattern or creating your own, consistency in bead placement and braid tightness will result in a more professional finish. A pattern board or a detailed diagram can help maintain consistency.
Experiment with Different Braids: While traditional three-strand braids are common, don't hesitate to try other types of braids like fishtail, four-strand, or even more complex patterns as you get more comfortable.
Now that you understand how to make braided bead bracelets, you're equipped to create beautiful, personalized jewelry. This guide has provided you with the necessary materials and a clear, step-by-step process to ensure your success. Braided bead bracelets are not only fun to make but also serve as thoughtful gifts or fashionable additions to your accessory collection. Don’t hesitate to experiment with different beads and colors to express your unique style. Start creating today and share your designs with friends and family!
For braided bead bracelets, nylon or polyester cords are ideal due to their durability and flexibility. These materials also come in a variety of colors, allowing for creative and vibrant designs.
Choosing the right bead size depends on your design preference. Smaller beads are perfect for delicate, intricate patterns, while larger beads make a bold statement and are easier to work with for beginners.
Absolutely! Braided bead bracelets are beginner-friendly. Start with simple patterns and larger beads, which are easier to handle, and use online tutorials or kits designed for beginners to guide you through the process.
Discover the best types of beads for bracelets and enhance your jewelry making skills with our expert guide!
Read More
Learn how to make a bead cuff bracelet with this guide. Find essential materials, detailed instructions, and customization tips for a unique accessory.
Read More
Explore types, top picks, and factors to consider in choosing the best beaded bracelets. Find the perfect accessory that suits your unique style and needs.
Read More
Discover endless bead bracelet color ideas to elevate your style. Explore vibrant hues and combinations for your perfect accessory.
Read More