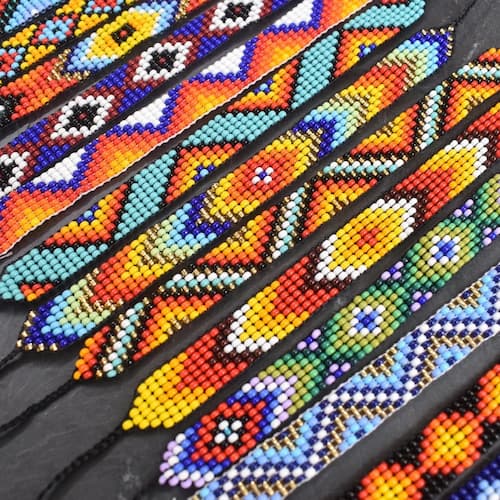
Creating beautiful bead loom bracelets is a delightful and rewarding craft that allows for endless creativity and personalization. Wondering how to make a bead loom bracelet by yourself? Don't worry. In this article, we'll explore the essential materials and the step-by-step process of how to make a beaded loom bracelet, from setting up your loom to weaving your beads. Additionally, we delve into designing your bracelet with various patterns and inspirations to spark your creativity. Whether you're a beginner or an experienced crafter, this guide offers everything you need to create stunning bead loom bracelets.

Crafting a bead loom bracelet is an enjoyable and creative endeavor that requires some essential materials. Before diving into the intricacies of how to make a loom bracelet with beads, ensure you have the following supplies:
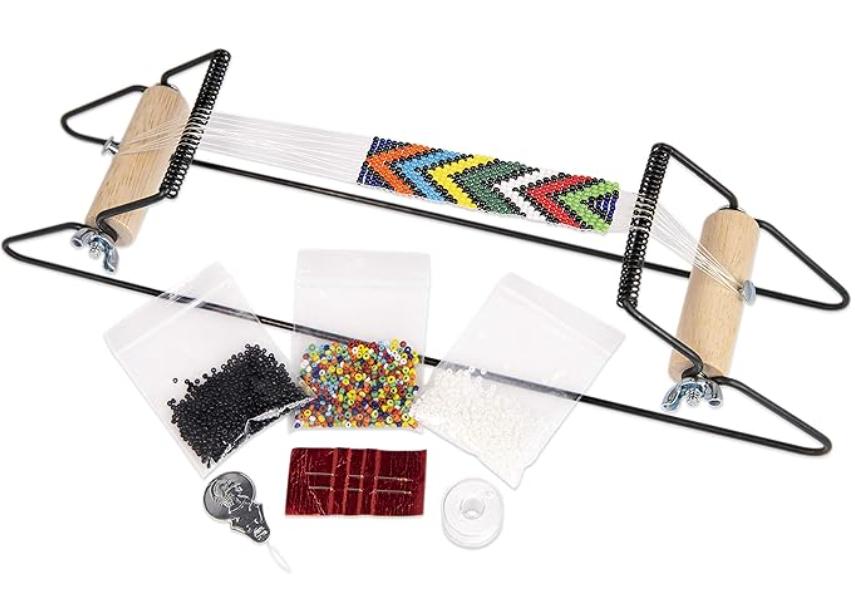
- Beads: Seed beads are most commonly used due to their uniform size and variety of colors.
- Loom or Loom Kit: A bead loom specifically designed for weaving beads, such as the Beadsmith Metal Bead Loom Kit, which includes the necessary components to get started.
- Thread: Strong beading thread, such as Nymo or FireLine, that can withstand tension and wear.
- Needles: Beading needles thin enough to pass through the seed beads multiple times.
- Scissors: For cutting thread and trimming excess.
- Clasps and Findings: To finish and secure your bracelet, including jump rings and lobster clasps.

Now that you have gathered your materials, let's start the step-by-step process of how to make a loom bead bracelet:
To start a bead loom bracelet, secure your thread with a double knot onto one nail of the loom. Ensure the thread is tightly fastened. This setup will anchor your weaving process.
Carefully stretch the thread across the loom, ensuring it fits into the grooves on each side. Wrap the thread around the opposite side of the loom once, then bring it back across to the starting side, placing it in the next groove. Continue this process until you have one more thread than the number of rows of beads in your pattern. Tie off the thread on the last nail, leaving a tail a few inches long, ensuring the strings are tightly secured.
Cut a piece of beading thread approximately the length from your fingers to your shoulder. Tie one end onto the first warp thread, leaving a tail of a few inches. Slide the knot as close to one side as possible and thread the needle on the other end.
String the beads onto the thread according to your pattern, starting from one end. Pass the needle and beads under the warp threads to the opposite side. Push the beads up through the spaces between the warp threads, ensuring they sit above the warp threads.
Turn the needle around and pass it back through the beads, ensuring it goes over the warp threads. This secures the beads in place. Repeat this process for each row, maintaining even tension to ensure a consistent pattern.
If you run out of thread before finishing, weave the remaining thread back and forth through previous rows until it feels secure. To start a new thread, tie it onto a warp thread, weave it through a few beads to secure it, and continue beading.
Once the bracelet reaches the desired length, carefully cut it off the loom, keeping the warp threads as long as possible. Tie all the warp threads together with double knots to secure the beads at both ends.
Apply strong glue to all the knots to ensure they stay secure. Let the glue dry completely, then trim any excess thread, being careful not to cut through the knots.
Apply a small amount of glue to the inside of the slider clasp and slide it onto the ends of the bracelet. Close the ends securely. Add a couple of jump rings and a lobster clasp to finish the bracelet. Additional jump rings can be added for size adjustment, and a chain can be included for further flexibility.
The design possibilities for bead loom bracelets are endless. Here are some sources of inspiration if you don't know how to bead loom a bracelet:
Creating bead loom bracelets requires patience, practice, and attention to detail. Here are some techniques and tips to help you master the art of bracelet making:
Gaining experience in the craft of how to make a bead loom bracelet allows for many creative possibilities. You can create gorgeous bracelets that perfectly capture your individual style and personality with the right supplies, methods, and motivation. Enjoy the process of crafting your unique piece of jewelry, and experiment with different bead patterns and colors to make each bracelet your own. Happy crafting!
Seed beads are the most commonly used beads for loom bracelets due to their small size and versatility. However, you can also experiment with other bead types such as glass beads, crystal beads, or gemstone beads to achieve different textures and effects.
While a bead loom provides a convenient and stable platform for weaving bracelets, it is possible to create loom-like effects using alternative methods such as bead weaving on a flat surface or using a cardboard loom. However, using a traditional bead loom typically yields the best results in terms of consistency and ease of use.
Creating a bead loom bracelet typically takes between 2 to 5 hours, depending on the complexity of the design and the skill level of the crafter. Simple patterns can be completed in less time, while intricate designs with numerous colors and beads may require more time and patience. It's essential to enjoy the process and take your time to ensure a high-quality end result.
Discover stunning bead crochet bracelet patterns for your next DIY project. Explore unique designs and step-by-step tutorials for beautiful jewelry creations.
Read MoreLearn step-by-step instructions and tips on how to crochet a beaded bracelet with our beginner-friendly guide. Start crafting beautiful accessories today.
Read MoreDiscover stunning Heishi beads bracelet ideas and find your perfect style. Learn how to choose material & how to make it to get ready for your next jewelry project.
Read MoreLearn how to make a beaded bracelet with clasps in this ultimate guide. From materials to step-by-step instructions, create your personalized jewelry with ease.
Read More