


Are you looking for a creative and personalized accessory? Name bracelets are a fantastic option! Not only are they stylish, but they also allow you to express your individuality. In this comprehensive guide, we will walk you through the process of how to make name bracelets. From selecting materials to customizing your design, we've got you covered. So read until the last section to know more.
Before we start the making a bracelet with name tutorial, it's essential to gather all the necessary materials. Here's what you'll need:
For the beaded bracelet:
Beads: Choose beads in various colors, shapes, and sizes. Make sure to select beads that complement your style and personality.
String or Wire: Choose a durable and flexible string or wire that can withstand daily wear. Nylon cord and elastic string are popular choices.
Alphabet Beads: These beads will form the letters of the name or word you want to feature on your bracelet. Ensure they are the appropriate size and style for your design.
Clasps and Findings: You'll need clasps to secure your bracelet around your wrist. Additionally, consider adding jump rings and crimp beads for a polished finish.
Tools: Basic jewelry-making tools such as scissors, needle-nose pliers, and wire cutters will be indispensable for assembling your bracelet.
For the woolen knitting bracelet:
Wool yarn: Choose a soft and colorful yarn that is comfortable to wear.
Knitting needles: Select needles that are suitable for the thickness of your yarn.
Beads: Optional for decoration, choose beads that have a hole large enough to fit the yarn through.
Clasp: Choose a clasp that matches the style of your bracelet.
Jump rings: These are used to attach the clasp to the bracelet.
In this part, we will discuss with you how to make a beaded name bracelet and how to make a friendship bracelet with names using wool yarn.
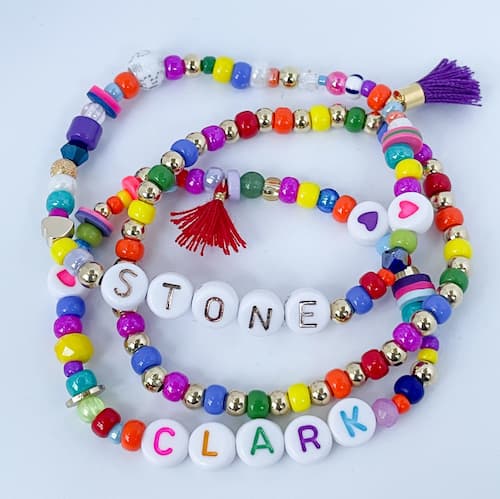
Beaded name bracelet:
Begin by selecting the beads you want to use, ensuring you have enough alphabet beads if you plan to add a name. Then, measure your wrist and cut a piece of string or wire to the appropriate length, adding a little extra for the clasp. As you string your beads, remember to leave enough space at the ends for the clasp to be attached. Once all the beads are in place, secure the clasp tightly using jump rings and crimp beads. Finally, trim any excess string or wire for a neat and finished look.
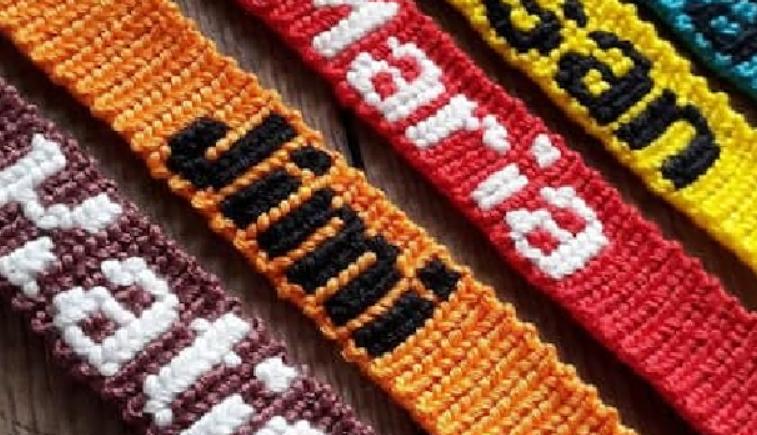
Friendship bracelet with names:
The steps of making a friendship bracelet with a name using wool yarn may be more complicated.
Step 1 Generate your pattern:
You can use the pattern generator on the website: friendship-bracelets.net or grid paper to plan your pattern. Center your pattern by calculating the number of blank rows before and after based on the total rows (93) and the generated pattern rows.
Step 2 Cut, tie, and layout strings:
Cut 7 interior strands (30" each) and one exterior string (at least 205" long). Tie all 8 ends together and secure the bracelet's tail. Arrange the strings with the exterior one on the outside for knotting.
Step 3 Knot your background:
Determine whether to start with forward or backward knots based on the even or odd count of blank rows. For forward knots, use a trick involving fingers for quick knotting. For backward knots, employ the same trick but in the reverse direction. Ensure straight rows by alternating between forward and backward knots.
Step 4 Knot your letter pattern:
Follow the pattern, using opposite knots to the direction of exterior color knots on the same line. Use backward knots for forward rows and forward knots for backward rows. After that, employ a memory trick of bending the knotting strand to remember the correct knot direction.
Step 5 Add the bottom set of blank rows:
Complete the second side of blank rows until reaching a total of 93 rows. Tie a knot below the last row to secure the bracelet. Braid both ends of the bracelet, separating strands into three groups securing each braid with a knot, and trimming off excess tail string to finish.
Adding personalized touches to your name bracelet can make it even more special. Here are some ideas for customization:
Charms: Incorporate charms that hold personal significance or represent your interests and hobbies.
Birthstones: Include birthstone beads to represent the birth months of loved ones or special occasions.
Spacer Beads: Use spacer beads to add texture and dimension to your bracelet, creating visual interest.
Color Scheme: Experiment with different color combinations to create a bracelet that reflects your unique style.
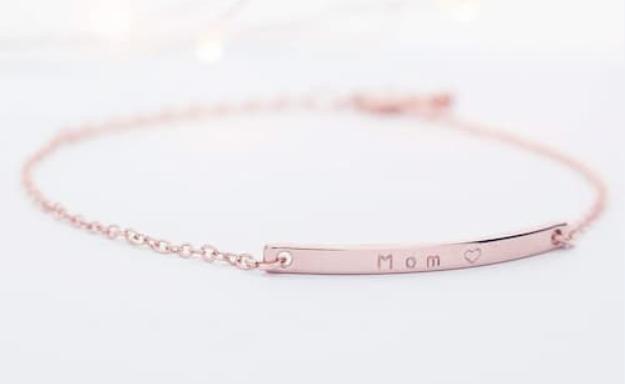
Custom Name Bracelet (Engraved):
You can find inspiration from Petite Boutique Name Bar Bracelet. It is a great name bracelet that offers a sleek 16K design with an engravable ID tag and adjustable length. Ideal for personalization, it's perfect for various occasions like weddings or birthdays. Available in silver, gold-plated, or rose gold-plated, it exudes simplicity and elegance. Enjoy high-quality craftsmanship and prompt customer service.
All in all, making name bracelets is a fun and rewarding craft that allows you to showcase your creativity and individuality. By following this step-by-step guide on how to make name bracelets and experimenting with different materials and designs, you can create beautiful and personalized accessories that are sure to turn heads. So, gather your supplies, unleash your imagination, and start crafting your stunning name bracelets today!
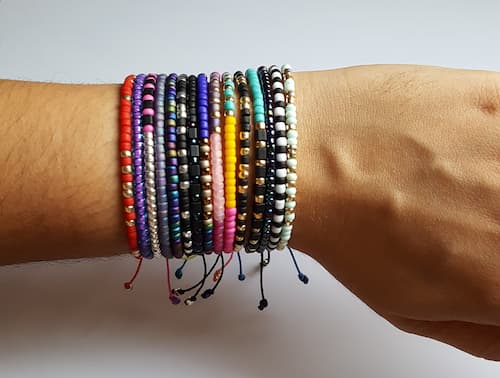
To choose the right size for a name bracelet, measure the wearer's wrist using a flexible tape measure. Add about 1 inch to this measurement to accommodate the clasp and ensure a comfortable fit. Consider the size of the beads and the spacing you want between them when determining the length of the bracelet.
Yes, you can add charms to your name bracelet to personalize it further. Charms can complement the beads and add a special touch to the bracelet. When adding charms, consider the overall design and theme of the bracelet to ensure they blend well with the beads and any alphabet beads spelling out a name.
To make a double-stranded name bracelet, simply use two pieces of string or wire instead of one when stringing your beads. Follow the same steps outlined in the guide, ensuring that both strands are the same length and are secured with clasps at each end.
Learn how to make adjustable bead bracelet with our tutorial, from choosing materials to tying knots for a perfect fit. Get creative and start crafting today!
Read More
Understanding red bead bracelet meaning adds depth to its style. It symbolizes protection, vitality, and good fortune across cultures, with a rich history.
Read More
How to make a bracelet with charms using simple materials? Read and follow our step-by-step guide to create your own unique beaded charm bracelet.
Read More
Discover the art of making glass bead bracelets with DIY guide on how to make glass bead bracelets. Unlock your creativity and craft stylish jewelry at home!
Read More