


Are you wondering how to make adjustable bead bracelet and how to adjust bead bracelet that fits perfectly every time? Look no further! This guide offers a step-by-step approach to crafting adjustable bead bracelets, allowing you to create customized accessories that suit any wrist size. From understanding the basics of adjustable bracelets to selecting the right materials and mastering essential techniques, this comprehensive guide covers everything you need to know about how to make one.
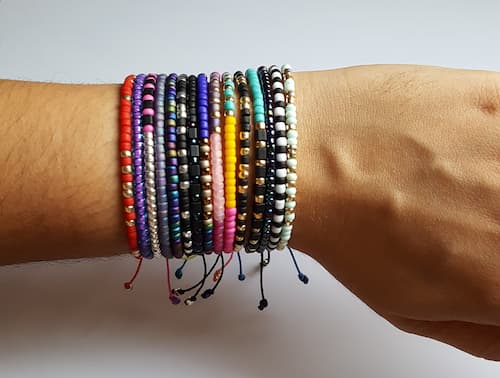
Adjustable bead bracelets are a versatile and stylish type of jewelry that can be crafted from various materials including gemstones, glass, wood, metal, or synthetics. They typically consist of beads strung on cords such as elastic, leather, nylon, or waxed cotton, and feature an adjustable mechanism like sliding knots, adjustable clasps, or elastic stretches to allow for a customizable fit. These bracelets are popular for their ease of use, comfort, and ability to fit a wide range of wrist sizes, making them ideal for gifts or versatile additions to any jewelry collection. Moreover, they often incorporate beads with symbolic or healing properties, adding a layer of personal significance for the wearer. Whether for their aesthetic variety or practical functionality, adjustable bead bracelets are a favored choice among jewelry lovers.
Before delving into our journey on how to make adjustable beaded bracelets, we need to gather the necessary materials:
Beads: Choose beads in various sizes, colors, and materials according to your preference.
Cord: Elastic, leather, or nylon thread, depending on the style you want.
Adjustable Knot: Know how to tie sliding knots if you are using non-elastic cords.
Scissors: For cutting the cord.
Tape Measure: To measure the length of the bracelet.
Optional: Charms, spacer beads, or decorative elements to embellish your bracelet.
Follow these simple steps on how to make adjustable bracelet with beads:
Step 1: Design Your Bracelet
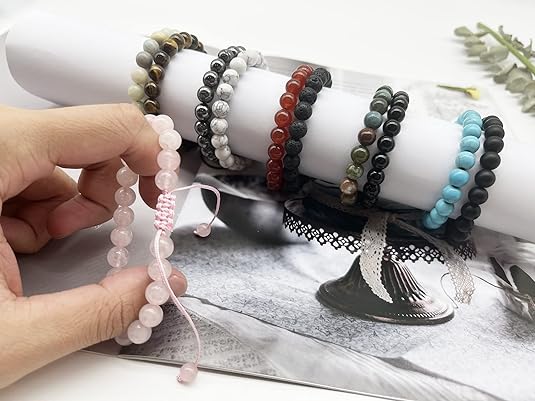
Layout your beads in the order you want them to appear on the bracelet. Get inspired from the SROBENZ Gemstone Adjustable Bracelet. You can consider mixing different colors, shapes, and textures to create a visually appealing design.
Step 2: Cut the Cord
Use a tape measure to determine the length of your wrist and decide how loose or tight you want your bracelet to be. Then cut a piece of cord about 12 inches longer than your wrist measurement to accommodate the knots and adjustments. If you are using nylon or leather, lightly singe the ends with a lighter to prevent fraying.
Step 3: String the Beads
Tie a basic knot at one end of your cord to prevent beads from falling off as you string them. Slide the beads onto the cord according to your planned design. Ensure there's enough cord on both ends for tying the adjustable knots.
Step 4: Tie the Adjustable Knots
If you are using the non-elastic cord, tie a sliding knot for adjustability. To do this, you can lay the bracelet flat with both ends parallel. Take one end and make a loop around the other part of the bracelet, then pull the end through the loop to form a basic knot; repeat to secure it. Do the same on the other side. Then pull both ends to adjust the size.
Step 5: Finishing Touches
Once the knots are secure and the bracelet fits comfortably, trim any excess cord. If desired, move beads over the knots to hide them, or use a bead to cover the knots.
Step 6: Test and Adjust
Try on the bracelet to ensure it fits well and adjusts easily. If necessary, adjust the knots or add/remove beads.
After reading the adjustable bead bracelet tutorial, you might want some tips and tricks to enhance your experience crafting adjustable bead bracelets. Here are extra tips on how to DIY adjustable bracelet with beads:
1.Use a Beading Needle: Threading beads, especially small or intricate ones, becomes much easier with a beading needle. It helps in maneuvering the beads onto the cord more efficiently.
2.Secure Knots with Glue: Apply a small amount of clear glue or nail polish to your knots once tied. This reinforces the knot and prevents it from unraveling, ensuring the durability of your bracelet.
3.Experiment with Patterns: Don't hesitate to experiment with different bead patterns and arrangements. This can lead to unique and personalized bracelet designs that stand out.
4.Mix Bead Sizes: Incorporating beads of various sizes can add depth and visual interest to your bracelet. Larger beads can serve as focal points while smaller beads can fill spaces and add texture.
In summary, knowing how to make adjustable bead bracelet is a rewarding and enjoyable DIY project that allows you to express your creativity and style. With the right materials, techniques, and a dash of imagination, you can design custom bracelets that reflect your personality and taste. Now, gather your supplies, follow the steps outlined in this guide, and start creating your own beautiful adjustable bead bracelets today!
For an adjustable bracelet, aim for a size range that accommodates most wrist sizes comfortably. For women, consider a range from 5 inches to 10 inches, with the most common size being 7 inches. For men, an adjustable range from 7.5 inches to 10.5 inches is ideal, with 8 inches as the most common size. These ranges ensure the bracelets can be adjusted for a snug or loose fit.
Nylon, polyester, and waxed cotton cords are popular choices for adjustable bracelets due to their durability and flexibility. Choose a string that complements your beads and provides sufficient strength to support the bracelet.
To make a square knot for an adjustable bracelet, start with two cords, laying them parallel. Cross the left cord over the right, tucking it underneath and pulling it through the loop to form the first half of the knot. Then, cross the now-right cord over the left, pass it under again, and pull through the loop. Tighten to secure. Repeat this process, alternating sides, to lengthen the knot for adjustability.

Understanding red bead bracelet meaning adds depth to its style. It symbolizes protection, vitality, and good fortune across cultures, with a rich history.
Read More
How to make a bracelet with charms using simple materials? Read and follow our step-by-step guide to create your own unique beaded charm bracelet.
Read More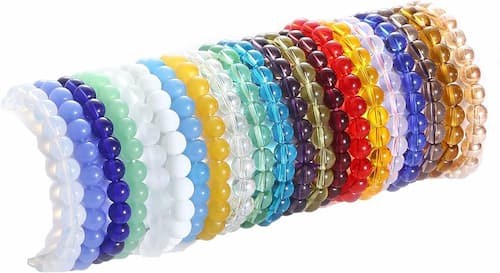
Discover the art of making glass bead bracelets with DIY guide on how to make glass bead bracelets. Unlock your creativity and craft stylish jewelry at home!
Read More
Wondering how much should a wedding ring cost? Uncover average prices, factors affecting costs, and expert tips to save on your wedding ring in the guide.
Read More