


If you're looking to add a personal touch to your jewelry collection, then learning how to make beaded earrings is a great place to start. Our step-by-step guide will guide you through everything you need to know about crafting your own unique earrings, from selecting the right beads to choosing the perfect wire. This tutorial will undoubtedly inspire you to create stunning pieces that reflect your personal style. So, get ready to unleash your creativity and let your imagination run wild!
Understanding the different types of beads is essential for anyone venturing into the art of making bead bracelets. Each bead type offers unique characteristics and affects the look, feel, and style of the finished piece. Below, we explore some of the most popular bead types:
1. Seed Beads: Small and versatile, seed beads are often used in detailed work such as weaving or embroidery. They come in various colors and finishes, making them perfect for intricate patterns.
2. Pony Beads: Larger than seed beads, pony beads feature a larger hole, making them suitable for thicker stringing materials. They are often used in children’s crafts due to their size and the simplicity with which they can be handled.
3. Bicone Beads: As the name suggests, bicone beads have a two-conical shape. Their unique shape allows light to be captured and refracted beautifully, adding sparkle and dimension to any piece. This can be a good choice for making earrings with beads as well.
4. Faceted Beads: Cut in a way that creates multiple flat surfaces or facets, these beads catch the light brilliantly, making them popular in creating elegant, sparkling jewelry.
5. Glass Beads: Available in many shapes, sizes, and finishes, glass beads add a touch of elegance to jewelry. They can mimic the look of precious stones at a fraction of the cost.
6. Wooden Beads: Wooden beads bring a natural, organic feel to jewelry designs, perfect for making bracelets with beads. They are lightweight, making them an excellent choice for larger, bolder pieces that won’t weigh down the wearer.
7. Metal Beads: Made from metals like gold, silver, brass, and copper, these beads add a durable and often luxurious element to jewelry. They can be simple or intricate, polished, or antique-finished.
8. Gemstone Beads: Gemstone beads are the perfect choice for those looking to add natural beauty and various properties to their creations. They come in every imaginable fun color, shape, and size. Thus, making beaded earrings with gemstone beads can turn into an amazing piece!
To start practicing how to make earrings with beads, you will need the following set of supplies:
· Seed Beads: These are small beads typically used in weaving intricate jewelry designs.
· Thread: Regular sewing thread is sufficient for stringing the beads together.
· Beading Needle: A fine needle designed to pass through the tiny holes of seed beads.
· Earring Hooks: Available in various metals, these are the parts that go through the pierced earlobe.
· Scissors: For cutting the thread.
· Pliers: To open and close the earring hooks when attaching them to your earrings.
Here's a step-by-step guide on how to make bead earrings that you can follow:
Step 1: Sketch Out Your Design
Begin by sketching a rough design of your earrings. This doesn't have to be perfect but serves as a blueprint for your creation.
Step 2: Start Your First Row
Cut approximately 2 to 3 feet of thread and thread it through the beading needle. Slide four seed beads onto the thread, doubling back through the first two beads, which will become part of the bottom of your fringe triangle.
Step 3: Weave Through the Next Two Beads
Weave down through the second pair of beads so the thread comes out beneath them, preparing you for the next step.
Step 4: Weave on Two More Beads
Add two beads onto the string, then weave back into the top of the earlier pair before coming up through the new beads, pulling the thread tight to secure them in place.
Step 5: Continue This Process
Keep adding beads following the pattern you've designed in Step 1 until you reach the desired width for the bottom of your triangle.
Step 6: Start a New Row
With the width established, begin the second row. Add two beads and weave under the loop between the last two beads of the first row, then back through the new beads.
Step 7: Continue Weaving Up the Triangle
Continue adding rows by repeating the previous steps, diminishing the number of beads with each row to form the triangular earring shape. Vary colors as desired to achieve your design.
Step 8: Create a Loop for the Earring Hook
With just two beads on the last row, add six more beads to form a small loop. Weave the needle through these beads to make a sturdy loop to attach the earring hook.
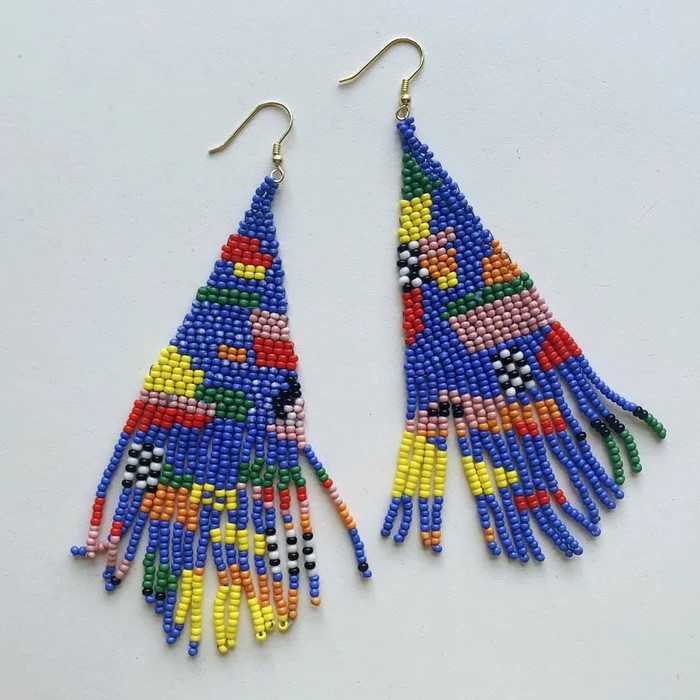
Step 9: Add the Fringe!
Determine the length of your shortest fringe, threading this number of beads, then loop back omitting the last bead to secure this fringe strand.
Step 10: Continue Adding Fringe
Create each subsequent fringe strand, gradually increasing in length to form a graduated fringe effect, until you reach your longest strand. Then symmetrically decrease the length of the remaining strands.
Step 11: Repeat This Entire Process
Duplicate the process to create the second earring, ensuring it mirrors the first one.
Step 12: Add the Earring Hooks
Open the hook using pliers, slip in the loop created in Step 8, and then close the hook securely.
Step 13: Enjoy!
Once your hooks are secured, your unique beads handmade earrings are ready to wear. This project allows room for creativity and individuality through different patterns and color combinations.
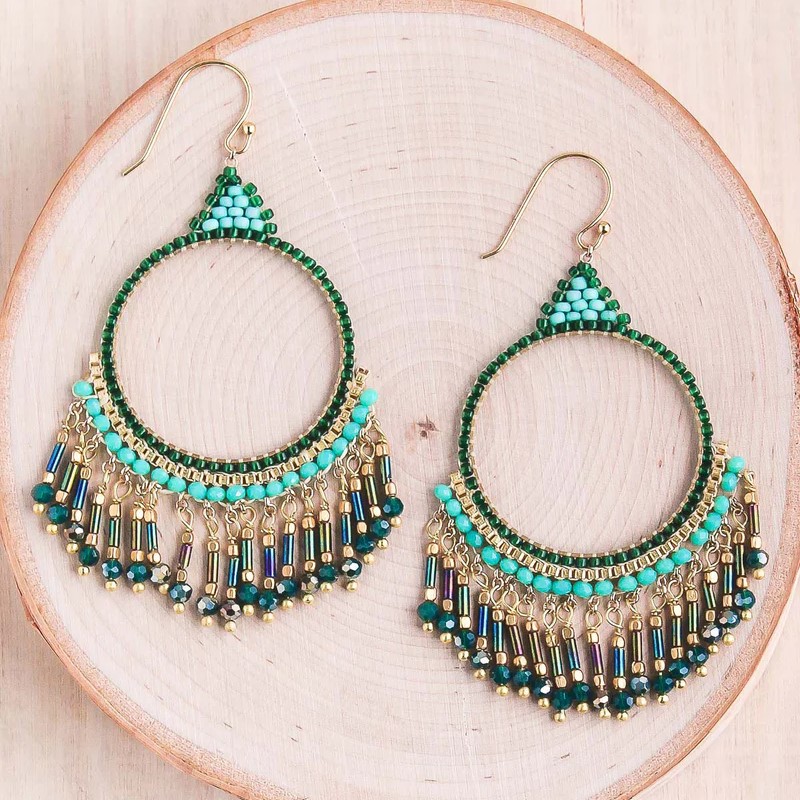
If you find making a pair of beaded earrings difficult, you can choose to buy a pair. Samiyack Beaded Earrings are a good choice, which is a remarkable display of elegance and craftsmanship. These drop dangle beaded earrings are perfect for any occasion, adding a classic yet sophisticated touch to your attire. Featuring classic gold accents and top-quality beads, these earrings exude grace and sophistication. Crafted with durable beads and zinc, they ensure longevity. The French wire design offers simple and secure wear, while the tassel-like dangle creates an eye-catching statement. Available in seven vibrant colors, these earrings are perfect for any occasion, from parties to everyday wear.

In conclusion, creating beaded earrings is a wonderful way to express your creativity and add a fun personal touch to your accessories. With a little bit of knowledge and some essential supplies, you can transform simple beads into stunning pieces of jewelry that tell unique stories. So, don't hesitate to practice how to make beaded earrings and let your creativity flourish in this delightful adventure of personal expression!
Here are some commonly asked queries on how to make beaded earrings.
Beaded earrings can fade over time, especially if frequently exposed to sunlight, harsh chemicals, or if they are made with lower-quality beads. The extent of fading largely depends on the materials used and the conditions they are subjected to.
To ensure your beaded earrings are durable, choose high-quality beads and thread, incorporate secure knotting techniques, avoid exposure to water and chemicals, and store them properly when not in use. Regular maintenance, like checking for loose beads and re-knotting if necessary, also helps prolong their life.
The time it takes to make beads handmade earrings can vary widely, typically ranging from 30 minutes to several hours, depending on the complexity of the design, the skill level of the creator, and the techniques used. Simple designs might take less time, while intricate patterns or weaving techniques require more.
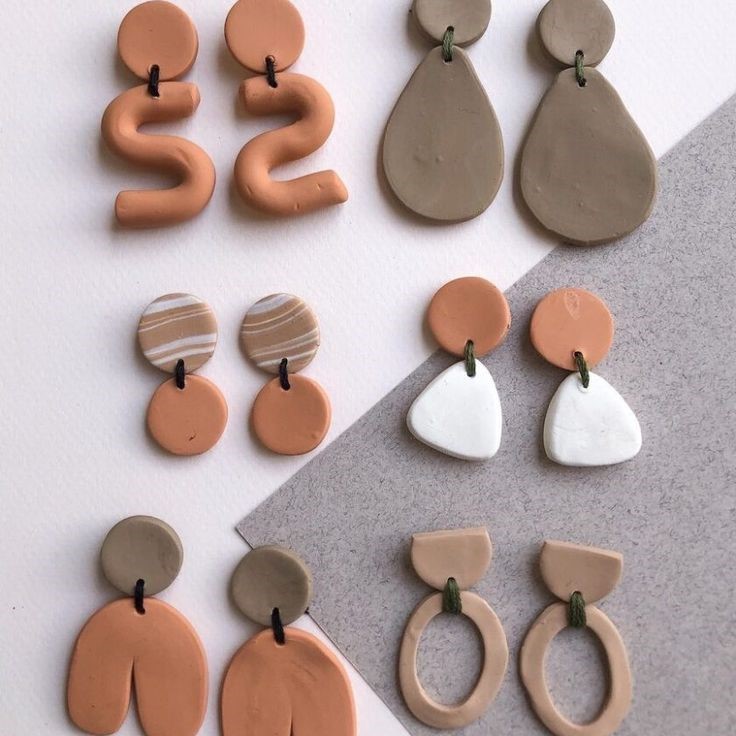
Master how to make clay earrings with our guide. Get essential tool insights, materials, and a step-by-step process for crafting unique dangle pieces.
Read More
Discover where to buy earrings! Find the best one for any occasion. Shop the latest trends online or in-store and complete your look with the ideal pair today.
Read More
Get expert advice on how to clean diamond earrings with easy steps. Keep your precious jewels sparkling with regular cleaning and care tips.
Read More
Get tips on how to take off earrings with safety back, care for ears post-removal, and insights on the best easy-to-wear earrings.
Read More