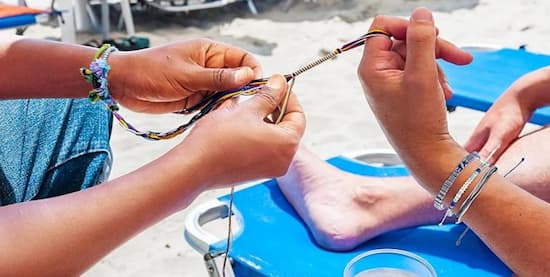
Ankle bracelets, with their subtle charm and effortless style, add a touch of bohemian flair to any outfit. But how to make ankle bracelets and elevate your style with them? That’s precisely the topic of our blog. In this blog, we’ll explore the process of crafting your own ankle bracelet. From understanding ankle bracelets to the step-by-step guide to making one, we’ve got you covered. Dive into the world of DIY ankle bracelets and let your imagination soar now!

Ankle bracelets, also known as anklets or ankle chains, are decorative accessories worn around the ankle.
Ankle bracelets serve as stylish adornments that accentuate the ankle, adding a subtle touch of glamour to any ensemble. They can evoke a sense of carefree elegance, embodying a relaxed and bohemian vibe.
In recent years, ankle bracelets have experienced a resurgence in popularity, becoming a staple accessory for fashion-forward individuals seeking to elevate their look. Since ankle bracelets are easy to craft, they become popular DIY choices. What's more, hand-made ankle bracelets are classy, durable, and take only a fraction of the time to make.
Crafting your own ankle bracelets opens up a world of creative possibilities. Here's a rundown of the essential materials you'll need to bring your unique designs to life:
Beads: Select an assortment of beads in various sizes, shapes, and colors to add texture and visual interest to your ankle bracelet.
String or Wire: Opt for durable string or wire that can withstand everyday wear. Nylon cord, hemp twine, or jewelry wire are popular choices.
Beading Needle: A beading needle is an indispensable tool for threading beads onto your chosen string or wire with precision and ease.
Scissors: Sharp scissors are essential for cutting your chosen string or wire to the desired length and for trimming any excess material.
Jewelry Glue: jewelry glue is used to strengthen knots and prevent them from coming undone.
Tape Measure: A tape measure is an indispensable tool for accurately measuring the length of your ankle bracelet.
Crimp Bead Cover: Crimp bead covers are small, hollow metal beads designed to conceal and protect crimp beads in jewelry making. In this project, we use them to conceal knots.
Crafting your own ankle bracelets is a rewarding and creative endeavor. How do you make ankle bracelets then? Follow these step-by-step instructions and you can bring your designs to life:
The first step of how to make anklets with beads is to plan your design in advance.
Begin by envisioning the style and aesthetic you want for your ankle bracelet. Consider the color scheme, types of beads or charms, and any specific patterns or arrangements you'd like to incorporate. In addition, sketching out your design on paper can help solidify your ideas before diving into the crafting process.
With a clear design plan in mind, it is time to dive into the crafting process. Begin by measuring the desired length for your ankle bracelet. Use a piece of string to wrap around your ankle, and add at least 3 inches. The purpose of this extra length is to accommodate both the size of beads and the final knotting process once all beads are strung on. Once you've worked out the length needed, carefully cut your chosen string to size using sharp scissors.
With the string cut to length, it's time to start stringing the beads according to your pre-set design plan. Stringing the beads on requires meticulous attention. When threading the beads on, ensure they're spaced evenly and securely in place. You can place bead stoppers at the end of the string to prevent beads from falling off the cord. After you’ve worked your way to a length about the circumference of your ankle, it is time to stop beading and start to tie off. Otherwise, you’ll not have enough length of thread for a knot.

Once you’re done with the beading process, it's time to secure the ends of your ankle bracelet and make it a closed circle.
The easiest way to tie off a DIY bead ankle bracelet is to tie a knot with both ends of your beading string. The knot can take many forms. For example, it could be a triple square knot or a surgeon’s knot. You can also add a dab of jewelry glue to the knots for extra security. After the knot is tied, trim any excess string or wire with scissors, taking care not to cut too close to the knots.
Our DIY bead ankle bracelet is basically complete at this point. However, as the knot is exposed, you can also make the extra move of hiding the knot to enhance the appearance of your handicraft.
There are two common approaches to hiding a knot. One approach to hiding the knot is to carefully slide it under adjacent beads. Using a beading needle or tweezers, gently maneuver the knot into the hole of an adjacent bead. Ensure the knot is snugly tucked away and not visible from the outside.
Another option is to use crimp bead covers to conceal the knot. These small, hollow metal beads are designed to cover crimp beads, but they can also be used to hide knots effectively. To do this, simply place the crimp bead cover over the knot and close it. This way, the knot is securely encased in your crimp bead cover, leaving a neat look for your ankle bracelet.
Crafting your own ankle bracelets is a delightful journey of creativity and self-expression. From selecting materials to tying off the bracelet, each step of how to make anklets with beads offers an opportunity to infuse your personal style into every detail. By following our step-by-step guide of how to make ankle bracelets outlined in this blog, you can create stunning ankle bracelets that not only match the Yinkin Adjustable Beaded Anklet Bracelet in style but also reflect your unique taste and personality.
For women, there are no strict rules regarding the side to wear an ankle bracelet on. The decision of which side to wear an ankle bracelet on is personal and can vary based on individual preferences and cultural influences. Whether on the left or right ankle, wearing a bracelet symbolizes beauty and self-expression, plus adding a touch of elegance.
Ankle bracelets hold diverse spiritual meanings across cultures. In many traditions, they symbolize protection, warding off negative energies and evil spirits. Some also believe they enhance inner strength and promote balance, aligning with chakras or energy centers.
Wearing ankle bracelets on both ankles is entirely acceptable and a matter of personal preference. There are no strict rules dictating which ankle to wear a bracelet on, making it a matter of individual expression and style.
How to make a heart friendship bracelet? Follow our instructions & craft this lovely token of friendship. We cover both general guidance and enhancement tips.
Read MoreExplore our detailed bangle bracelet size chart to discover your perfect fit. Learn to measure your hand, understand sizing, and avoid common mistakes.
Read MoreDiscover unique letter bead bracelet ideas to personalize your style. Learn the materials to use and follow step-by-step instructions to make your own bracelet!
Read MoreExplore the rich symbolism and deep jade bracelet meaning in our new blog. Learn how these stunning pieces of jewelry can influence your life positively.
Read More