Creating jewelry is a fun and rewarding hobby that lets you craft something truly personal. A shark tooth necklace is a great way to transform a unique piece of nature into a stylish accessory. Whether you’ve found a shark tooth during a beachside adventure or purchased one as a keepsake, this project allows you to turn it into a meaningful, eye-catching piece of jewelry.
This guide will give you the step-by-step process of how to make a shark tooth necklace, the materials you’ll need, and tips for styling your finished necklace.
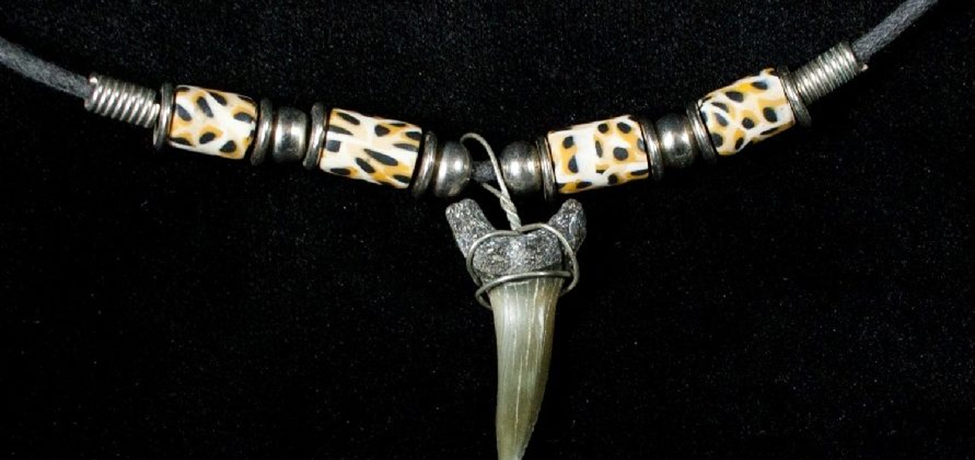
Before diving into the steps to create your shark tooth necklace, it’s important to gather all the necessary materials. Having everything ready will make the process smooth and enjoyable.
Materials:
Now that you have all your materials ready, it's time to start learning how to make shark tooth necklace. Follow these simple step-by-step instructions to craft your unique accessory.
Step 1: Clean the Shark Tooth
Start by thoroughly cleaning the shark tooth. If it’s from the beach, it may have sand or debris on it. Rinse it under running water and gently scrub with a soft brush to remove residue. Allow it to dry completely.
Step 2: Cut the Wire
Cut about 30 cm (or more) of jewelry wire, depending on the size of your shark tooth. It’s better to have extra wire than not enough.
Step 3: Wrap the Tooth
Place the shark tooth in the center of the wire. Bring both ends of the wire up the front of the tooth, twist them together at the top, and then bring the wire back down. Repeat this process a few times, wrapping tightly around the tooth.

Step 4: Secure the Wire
After you’ve wrapped the wire around the shark tooth, hold the two ends together and twist them tightly in the same direction. Continue twisting until you reach the end of the wire, creating a secure hold. If the leftover wire is longer than necessary, use wire cutters to trim the excess, leaving about half an inch to tuck under the wraps. Make sure the twists are firm to prevent any loosening.
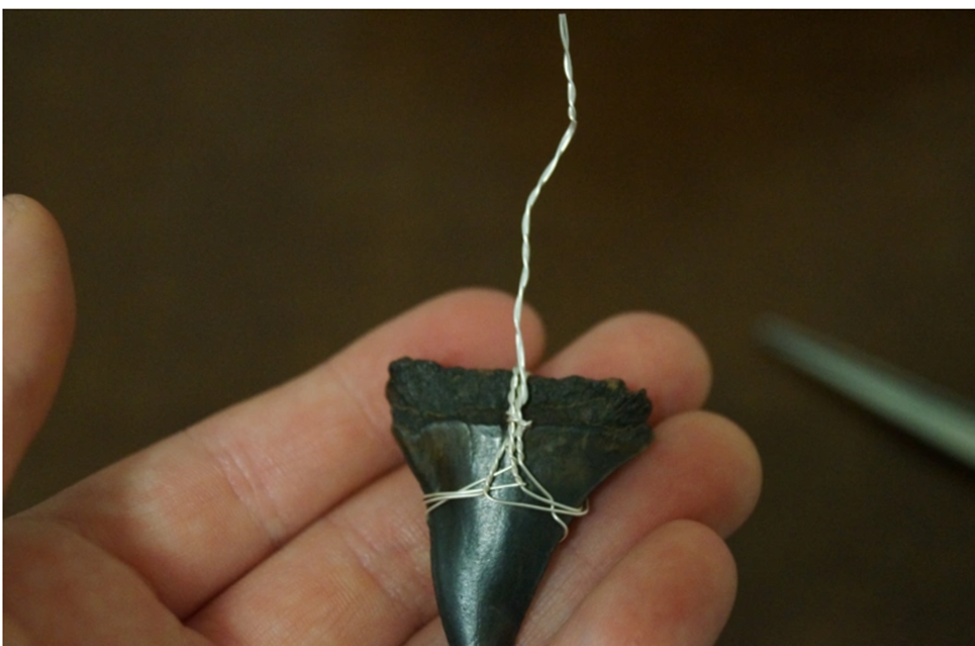
Step 5: Add the Jump Ring
Take a small jump ring and slide it onto your necklace cord or chain. You can use pliers to open the jump ring slightly for easier sliding. Make sure the jump ring is large enough to hold the weight of the tooth and sit comfortably on the cord. Ensure the jump ring is securely closed after adding the cord.
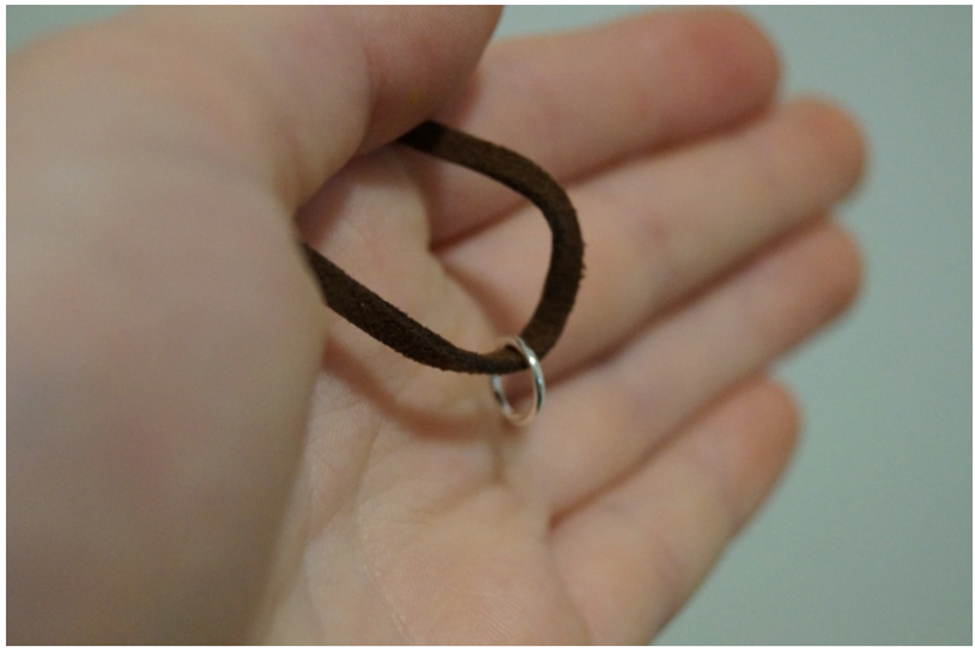
Step 6: Attach to the Wire
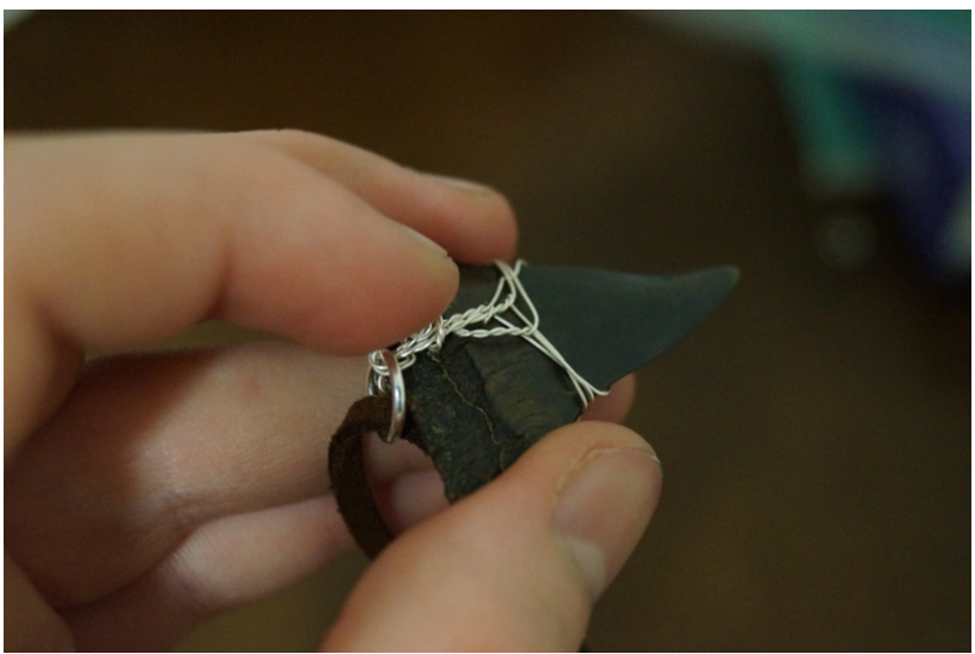
Now, take the jump ring with the cord threaded through it and slide it onto the twisted wire from Step 4. Position it so the wire wraps around the tooth and the jump ring sits at the top, close to the wire twists. This will allow the tooth to hang securely when worn.
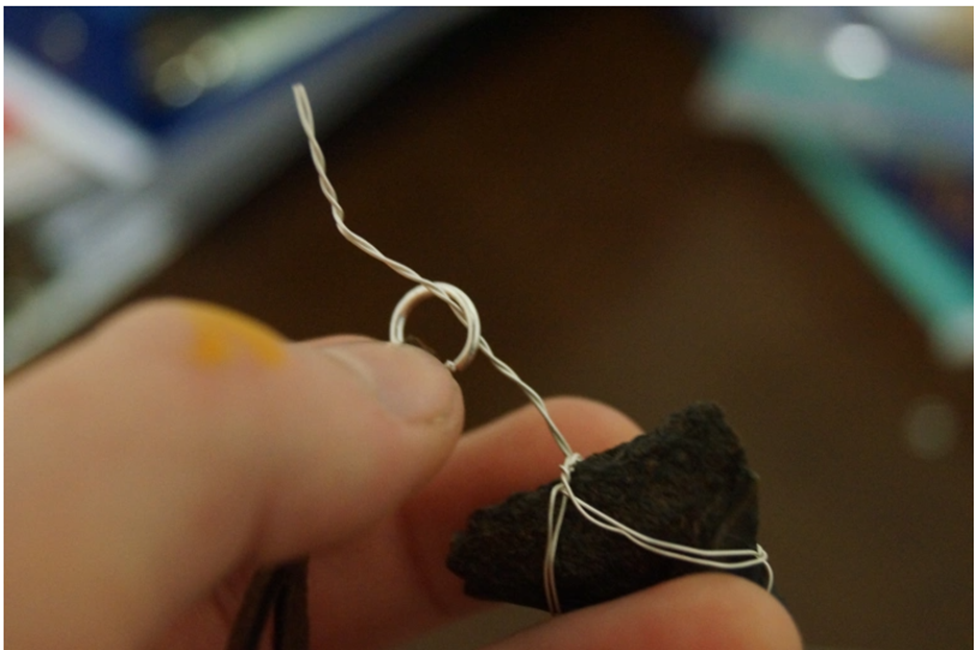
Step 7: Tuck the Wire
To fully secure the shark tooth, gently tuck the remaining ends of the wire underneath the existing wraps around the tooth. Using pliers, carefully push the wire under and between the other coils, ensuring it is hidden and tightly secured. This will prevent the wire from loosening or causing the tooth to fall out.
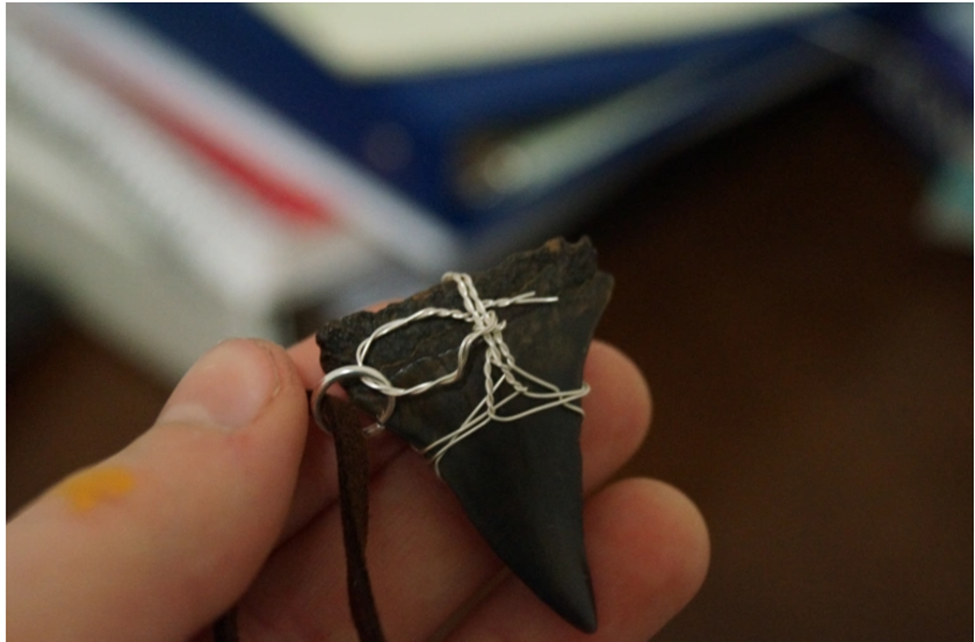
Step 8: Final Wraps and Trimming
Repeat the process from Step 7 two more times to ensure the shark tooth is firmly attached to the wire. Make sure the wraps are tight and secure, ensuring the tooth is safe from slipping out. Once you feel the tooth is stable, trim any excess wire with wire cutters. Finally, use pliers to press down any sharp wire ends to avoid injury and give a polished, smooth finish to your necklace.
Tips to Care for Your Shark Tooth Necklace
Caring for your shark tooth necklace ensures it stays beautiful and lasts for years. Here are some essential tips:
To maintain your shark tooth necklace’s beauty, avoid exposing it to perfumes, body lotions, or other harsh chemicals, as these can damage the natural tooth material and any added components.
Keep your necklace in a cool, dry place away from direct sunlight to prevent fading or wear over time. Consider using a soft pouch or jewelry box for added protection.
When cleaning, use a soft, damp cloth to wipe down the necklace gently. Avoid soaking it in water or submerging it, especially if glue was used in your design, to ensure its durability.
Once you’ve crafted your shark tooth necklace, you can take it a step further by adding unique touches to enhance its style. Here are some tips to make your necklace even more eye-catching and personalized:
Enhance your DIY shark tooth necklace by incorporating beads that complement the tooth’s color or match your style. Choose beads in different shapes, sizes, or materials to create a unique design.
Try different cord materials, such as hemp or silk, to create a variety of looks for your shark tooth necklace. These materials can add unique textures and styles, from rustic to elegant. Don’t hesitate to play with patterns or combinations to make your necklace stand out as a truly one-of-a-kind piece.
For a bolder and more dynamic design, incorporate multiple shark teeth alongside your main pendant. This layering effect not only adds depth to your necklace but also creates a unique statement piece that reflects your love for the ocean and its creatures.
Enhance your necklace by incorporating charms that reflect your personality or interests. Consider adding a tiny seashell, a starfish, or other meaningful symbols to give your jewelry extra significance. These small additions not only make your necklace more unique but also add a fun, personalized flair to your design.
A shark tooth necklace is a unique and versatile accessory that can be styled in many ways. Whether you’re looking for a subtle, casual touch, a bold statement piece, or something elegant for a formal event, there’s a shark tooth necklace for every occasion. By learning how to make a shark tooth necklace, you can create a personalized piece of jewelry that not only showcases your creativity but also carries deep symbolism. No matter how you choose to wear it, a shark tooth necklace is sure to make a lasting impression and become a cherished part of your collection.
Yes, you can create a shark tooth necklace without using real shark teeth. Many modern designs feature synthetic or metal-cast shark teeth made from materials like gold, silver, or resin. These options replicate the appearance of real teeth while being eco-friendly and cruelty-free. However, some jewelry still uses authentic shark teeth plated with gold or silver for added style.
Wearing a shark tooth is often seen as a symbol of protection, strength, and bravery. In ancient Hawaiian lore, shark teeth were believed to protect the wearer from shark attacks. This belief stems from a legend about a young Hawaiian warrior who fought and defeated a sea god.
Yes, you can! Instead of drilling a hole, you can wrap the shark tooth with wire for a natural look or use a bail for a more polished finish. Both methods let you turn the shark tooth into a necklace without damaging it.
Learn how to store necklaces without tangling, the best way to organize necklaces for home or travel, and tips to keep them tarnish-free and in perfect condition.
Read MoreLearn how to clean a necklace properly, from costume jewelry to gold, silver, and pearls, keeping them shiny and looking new with proper care.
Read MoreLearn how to make a necklace at home with this step-by-step DIY instruction, including beaded, pendant, chain, and shell necklace designs.
Read MoreThe guide explores why people wear necklace, uncovering 5 common reasons and their symbolic meanings. Learn the significance behind this popular accessory.
Read More