Necklaces are more than just accessories—they hold personal meaning and can effortlessly elevate any outfit. DIY offers a creative outlet and a sense of accomplishment, especially when designing something unique for yourself or a loved one. If you’ve been curious about how to make a necklace, you’re in the right place. In this guide, we’ll walk you through the essential materials, tools, and step-by-step instructions to help you create a necklace that’s truly one-of-a-kind.

Materials Needed for Making a Necklace
To get started, you’ll need a few basic materials:
Beads (glass, wood, or stone)
Necklace chain
Jewelry wire
Clasps
Jump rings
Cord or leather straps
Pendants
You’ll also need these tools:
Jewelry pliers
Beading needle
Crimp beads
Bead board
Once you have what you need, let's dive into how to create a necklace, where we'll guide you through the detailed process.
How to Make Necklaces: Step-by-Step Instructions
From design to final assembly, making necklaces is relatively straightforward, though it does require attention to detail. Below, we will uncover tutorials for 4 types of necklaces, starting with the most basic techniques and progressing to more intricate designs.
How to Make Beaded Necklace?
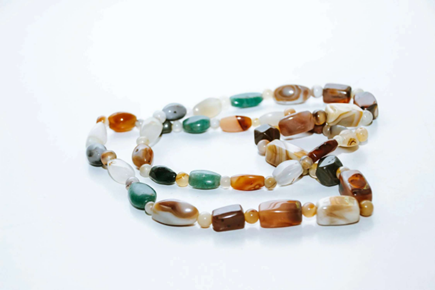
A beaded necklace is one of the simplest and most popular methods in jewelry making. Beads can be strung onto a necklace wire to form both elegant and colorful designs. Here’s how to get started:

1.Design the Layout: Ready to get creative? Start by laying out your beads and thinking about a simple pattern. A classic go-to is alternating bead sizes or colors. You could even stick with one color but change bead shapes for some variety. It’s all about what feels right for you!
2.Measure and Cut Wire: Now, grab your jewelry wire. You may measure out about 18 inches for a standard necklace length—add a little extra (4-6 inches) just to be safe. You’ll need those extra inches for the clasp, and trust me, it’s better to have too much wire than too little!
3.String the Beads: Time to string your beads! First, you may string them onto the wire to ensure they fit through the holes smoothly. Want to mix things up? You can try using different sizes or colors for an eye-catching design. For different sizes, you can alternate between large and small beads to create a balanced look. If you’re mixing colors, group them in a pattern or scatter them for a more random, playful design. Remember to keep it snug but not too tight—just let the beads fall naturally.
4.Attach the Clasp: For the clasp, go with a lobster claw or toggle clasp. Both are super easy to attach. Just simply slide the wire through a jump ring, secure it with crimp beads, and repeat on the other side. Make sure everything’s tight and secure so your necklace doesn’t come apart.
5.Finish the Ends: You may snip off any extra wire using wire cutters, but leave a little length for securing the clasp. You can use pliers to tuck the end neatly into a crimp bead or against the necklace so no sharp bits are poking out. And you’re done!
How to Make Pendant Necklace?
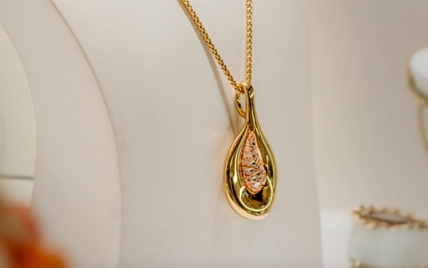
A pendant necklace adds an element of sophistication and personalization to your jewelry collection. Here’s how to craft one:

1.Select a Pendant: Choosing your pendant is the fun part! You can go with anything from polished gemstones and shiny metal shapes to cute handmade resin pieces. Want something personal? You can even try a charm with initials or a meaningful symbol. Whatever you pick, make sure it fits your vibe!
2.Prepare the Necklace Chain: Once you select, you can grab a chain that matches your pendant. If it’s a heavier pendant, you’ll want a sturdier chain, like stainless steel or gold. Then you pick jump rings that fit snugly with the chain links so everything hangs just right and feels secure when you wear it.
3.Open the Jump Rings: Here’s where you get to work with the jump rings. You may use two pairs of pliers and twist the jump ring open—don’t pull it apart! Twisting it keeps the ring’s shape intact so it’ll close properly without any gaps.
4.Attach the Pendant: Now, you can slide your pendant onto the jump ring and thread the ring onto the chain. Position the pendant where you want it, then use pliers to close the jump ring tightly, making sure it’s secure. You don’t want that pendant slipping off!
5.Add the Clasp: Finally, you can add a clasp to one end of the chain—lobster claws or toggles work great. Then attach the other end with another jump ring. Double-check everything is secure, and "boom", your pendant necklace is ready to shine!
How to Make Chain Necklace?
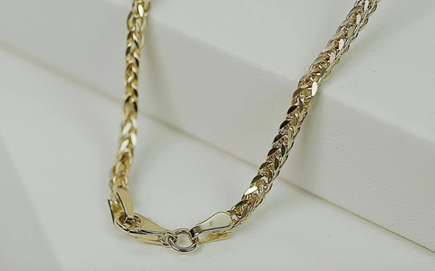
Chain necklaces are timeless and versatile, offering a sleek, minimalist look. Follow these steps for a simple yet elegant chain necklace:

1.Choose Your Pre-Made Chain: Start by picking the right chain for your style and design. For a simple look, a dainty cable chain works well, but if you want something chunkier, go for a larger link chain. You'd better ensure it’s the right length—typically 18 to 20 inches for a standard necklace.
2.Prepare the Chain Ends: Once your pre-made chain is cut to size, you’ll need to prep the ends to attach the clasp. You may use pliers to straighten any kinks or bends and ensure both ends are cleanly cut. You want everything smooth to avoid tangling or discomfort when wearing it.
3.Attach Jump Rings: Then you can grab your jump rings and use pliers to open them (remember: twist, don’t pull!). Slide a jump ring onto each chain end. You’ll use these rings to attach the clasp, so make sure the jump rings are the right size for your chain links.
4.Attach the Clasp: Now, you may attach a lobster clasp or toggle to one of the jump rings, and then secure the other jump ring to the other end of the chain. Everything is tightly closed so it doesn’t come apart while you’re wearing it.
5.Finishing Touches: Give your necklace a once-over to make sure everything is secure and even. If needed, trim any excess chain or adjust the clasp. For a little extra flair, you can add a charm or bead to the chain for a personal touch. And just like that, your chain necklace is ready to rock!
How to Make Shell Necklace?
A shell necklace evokes a coastal or bohemian aesthetic, perfect for beach-inspired jewelry. Here’s how to create one:

1.Collect Your Shell and Wire: Apart from the basic tools, you should choose a variety of shells, ideally with small natural holes. For a balanced design, pick shells of varying sizes (about 1-2 inches is ideal for most necklaces). Besides, you’ll need about 18-20 inches of jewelry wire for a standard necklace. If using thread, go for a strong nylon or silk thread.
2.Prepare the Shells: You should clean your seashells thoroughly with soap and water, removing any sand or debris. If the edges are rough, gently sand them with sandpaper. If your shells don’t have holes, use a small drill bit to carefully drill a hole through each shell. Be gentle to avoid cracking them.
3.Thread the Shells: Then you should thread your needle and start stringing the shells through their holes. If the shells are different sizes, alternate large and small ones to create a balanced design. You can add beads in between the shells for extra texture and color.
4.Secure the Ends: Once you’ve strung your shells, secure the ends. If you're using a clasp, attach it with jump rings to the ends of the wire. If you're not using a clasp, tie knots at both ends of the thread or wire to prevent the shells from sliding off.
5.Final Adjustments: Check the necklace for any loose shells or uneven spacing. If necessary, trim any excess wire and tuck the ends securely. Your shell necklace is now ready to wear!
Conclusion
Now that you know how to make a necklace, you're ready to dive into the creative process and design your own unique pieces. With just a few basic materials and a little time, you can create necklaces that reflect your personal style. So, whether you're making a DIY necklace for yourself or as a thoughtful gift, we hope this guide has inspired you to get started. Happy crafting!
FAQs
Can I make a necklace without using wire?
Yes, it is possible to create a necklace without using wire. Alternative materials such as cord, leather, or chain can be used to create simple designs. Beads can be strung directly onto these materials or attached using knots or crimp beads.
Can I make a necklace without any jewelry-making experience?
Absolutely! Necklace-making is an accessible craft that doesn't require previous experience. By following step-by-step instructions and starting with simple designs, beginners can easily create beautiful necklaces.
How can I personalize my handmade necklace?
You can select meaningful beads, pendants, or charms that reflect your personality or a special event. You can also engrave pendants, incorporate birthstones, or add initials for a custom touch.


