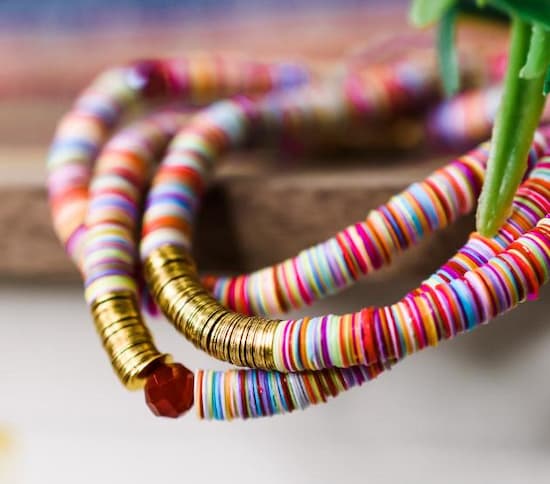
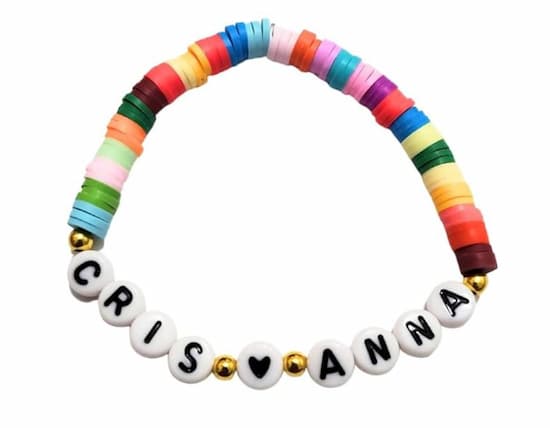
Crafting your own jewelry can be a satisfying and creative endeavor, and making a Heishi bead bracelet is a wonderful place to start. Heishi beads, traditionally made from materials like shell or stone, are small, disc-shaped beads that create a beautiful, natural look when strung together. So how to make a Heishi bead bracelet? As you’ll see, the process of crafting your own Heishi bead bracelet is rather simple. In this blog, we’ll unravel the detailed process of how to make Heishi bead bracelets by yourself. Get ready for the upcoming DIY adventure now!

Before embarking on our crafting journey, it is essential to know what the term Heishi bead bracelet refers to.
Heishi bead bracelets are crafted from small, disc-shaped beads traditionally made from materials like shell, stone, or metal. Originating from ancient indigenous cultures, Heishi beads hold cultural significance and are prized for their natural beauty and craftsmanship. These beads are meticulously shaped and smoothed, often by hand, before being strung together to create bracelets with a timeless appeal.
Heishi bead bracelets have retained much of their appeal throughout history. Nowadays, their popularity as jewelry accessories does not seem to fade. These bracelets are still regarded as unique and stylish accessories that are perfect for adding a touch of artisanal charm.
With the story of Heishi bead bracelets in mind, it's time to embark on the hands-on journey of crafting. Our crafting journey begins with gathering the essential supplies. You’ll need the following items for a smooth ride:
Heishi Beads: The heart of your bracelet, these small, disc-shaped beads are available in a variety of materials, allowing you to personalize your creation. How many Heishi beads per bracelet? Typically, around 70 beads suffice for most Heishi bead bracelets.
Elastic Cord: An essential component for stringing your beads, an elastic cord ensures flexibility and durability, accommodating various wrist sizes with ease.
Scissors: A trusty pair of scissors will be your go-to tool for cutting the cord to the desired length and trimming any excess.
Lighter: This handy tool helps seal the ends of the elastic cord, preventing fraying and securing your bracelet for long-lasting wear.
Beading Tray (Or Equivalent): While not mandatory, a beading tray or any flat surface with compartments will keep your beads organized and prevent them from rolling away during assembly, streamlining the process and minimizing frustration.
Crimp Bead Cover: These small items are powerful tools for hiding the knot and enabling a more polished finish for your handicraft.
Jewelry Pliers: A pair of jewelry pliers is used to close crimp bead covers with ease.
Crafting your own Heishi bead bracelet is a rewarding experience that allows you to infuse your personal style into every detail. Follow this step-by-step guide to create a bracelet that reflects your creativity and flair.
Before diving into the crafting process, take a moment to envision the design of your bracelet. Consider the patterns and color combinations that appeal to you. Do you prefer a symmetrical arrangement or a more eclectic mix of beads? Planning your design in advance ensures that you'll be delighted with the finished bracelet.
Creating a comfortable and organized workspace is essential for a smooth crafting experience. Find a well-lit area with plenty of room to spread out your materials. Keep your tools within easy reach and ensure that you have enough space to move comfortably as you string the beads.
Before threading the beads, measure the circumference of your wrist using a flexible tape measure. Your measurement of wrist circumference will determine where you need to stop when beading.
With your wrist circumference taken, it's time to start threading the Heishi beads onto the elastic cord. Begin by pulling out a length of elastic thread from the roll, but refrain from cutting it just yet. You'll need to pull out more thread as you progress through the beading process. Carefully thread each Heishi bead onto the elastic cord according to your design plan. If you find the beading process difficult due to frayed cord ends, grab your lighter and quickly pass the flame over the frayed end. As you work, gently guide the beads onto the cord, taking care not to stretch or strain the elastic.
As you bead, keep tabs on the distance between the first bead and the last bead. How many Heishi beads to make a bracelet? Once the said distance reaches the length of your wrist circumference, it is time to stop beading and cut the cord off. Leave several inches of slack before cutting so that you can tie knots later.
With your Heishi bead bracelet fully strung and the elastic cord cut to size, it's time to secure the ends to complete your creation. How to tie a Heishi bead bracelet? Carefully bring the two ends of the elastic cord together and tie a tight double knot. For added security, consider adding a dab of glue to the knot. A small amount of jewelry adhesive applied to the knot will help prevent it from coming undone over time. Afterward, trim away the excess cord around the knot.
Once the knot is securely tied and any excess cord has been trimmed, it's time to conceal it for a polished finish. A crimp bead cover is a perfect tool for concealing the knot. Place the crimp cover over the knot, ensuring that it completely encloses the knot. Then, gently squeeze the crimp cover closed using jewelry pliers. Voila, the unsightly knot disappears, and your newly crafted Heishi bead bracelet is ready to be worn and admired!

If you have previously thought that the question “How to make a Heishi bead bracelet?” admits only lengthy and sophisticated solutions, our blog has dispelled that notion. By following a couple of simple and intuitive steps outlined in our blog, you can craft bracelets that not only boast durability but also exude charm and individuality, reflecting your personal creative vision.
Heishi bracelets are traditionally crafted from small, disc-shaped beads made of natural materials such as shell and stone. Modern-day Heishi bracelets are made from a broader variety of materials, including polymer clay, natural stones, wood, metal, shells, etc.
A Heishi bead bracelet's ideal length varies based on personal preference and wrist size. Typically, bracelets range from 6.5 to 7.5 inches to fit most wrists comfortably. To determine the perfect length, measure your wrist circumference with a flexible tape measure and add a couple of inches for a snug and comfortable fit.
Choosing a quality Handmade Heishi Bead Bracelet involves considering several factors to find the perfect piece that suits your style and preferences:
Material: Decide on the material you prefer for the beads, such as natural options like shell, stone, or metal, or synthetic materials for a contemporary twist.
Design: Look for a design that resonates with you, whether it's a simple single-strand bracelet or a more elaborate multi-strand design with intricate patterns or charms.
Size: Ensure the bracelet fits comfortably by knowing your wrist size and selecting a bracelet with an appropriate length or adjustable closure.
Quality: Examine the craftsmanship and quality of the beads, cord, and any additional components to ensure durability and longevity.
Discover how to make Perler bead bracelets & unlock your inner artist. Follow our step-by-step guidance and create stunning beadwork that's uniquely yours.
Read MoreUnravel the amethyst bracelet meaning and its spiritual significance. Learn to choose, wear, and maintain an amethyst bracelet & let it guide your soul.
Read MoreMaster how to fix an elastic bracelet & restore its previous snug fit with us. Diagnose the problems with your bracelet and learn effective ways to fix them.
Read MoreUnravel the green bead bracelet meaning & embark on a journey of spirituality. Embrace the healing qualities of green bead bracelets & enhance emotional well-being.
Read More