A broken bracelet must break many wearer’s heart. But do you know you can fix your treasured piece at home at a lower price? If you want to learn how to fix a broken bracelet, you are at the right place. In this article, you will discover the tools, materials, and step-by-step techniques that jewelry professionals recommend to ensure your bracelets receive the care they deserve. You will embrace the art of bracelet restoration and keep your cherished pieces gleaming for years.
Exquisite bracelets are vulnerable to wear and tear. Identifying the common causes of bracelet damage is crucial for effective repair. The following are eight typical reasons behind bracelet breakages:
1. Water Damage
Continuous exposure to water or high humidity can cause certain metals to tarnish or rust, and can also weaken adhesives used in some bracelets.
2. Sun and Heat Damage
Direct sunlight causes discoloration and dullness, while UV light can lead to structural issues.
3. Chemical Damage
Household chemicals, chlorine, and cleaning products can cause discoloration, tarnish, and corrosion.
4. Damage by Beauty Products
Cosmetic products with oils and ingredients can dull the appearance of jewelry.
5. Physical Damage
Everyday wear and activities can result in scratches and dents, especially in environments involving machinery or outdoor tasks.
6. Improper Storage
Storing jewelry in the same box can lead to physical damage, especially if harder diamonds are stored with softer metals. On the other hand, necklaces, earrings, and bracelets can suffer damage if entangled during storage.
7. Damage Due to Age
Regular wear over an extended period can contribute to the natural aging of your bracelet. And lack of professional cleaning and care can lead to irreversible deterioration over time.
8. Poor DIY Cleaning Techniques
While DIY cleaning is popular, applying inappropriate liquids or materials, such as toothpaste or bleach, can lead to discoloration and damage.
Since you have grasped the root of the problem for a more precise and lasting solution. But do you know how to fix a bracelet that broke at home? Let's get going and find out more.
When it comes to bracelet repair, some essential tools and materials should be needed.
Tools:
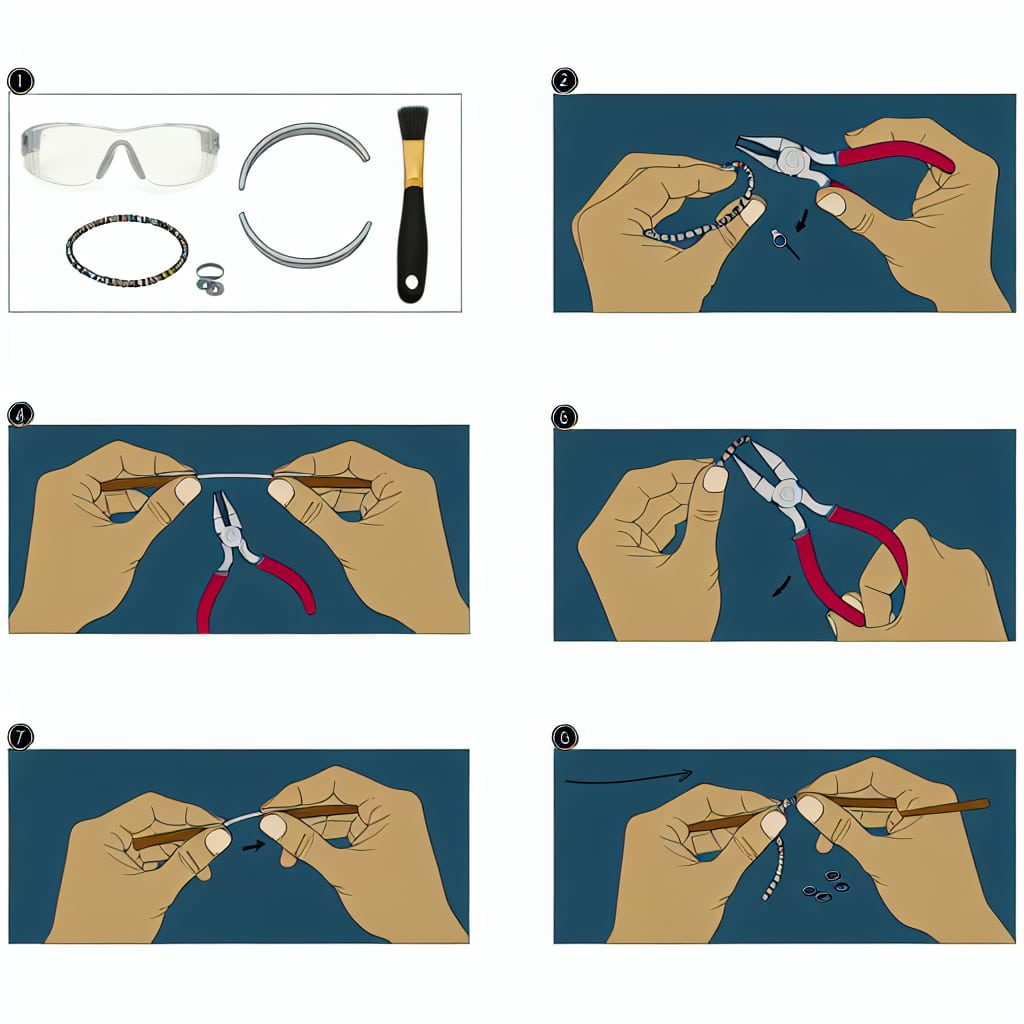
1. Needle-nose pliers: a pointed tip to grip, bend, and manipulate small components like jump rings and clasps.
2. Round-nose pliers: their round and tapered jaws create loops, bends, and shaping wire components.
3. Chain-nose pliers: flat, tapered jaws to grip, bend, and secure various elements, a balance between the precision of needle-nose pliers and the shaping ability of round-nose pliers.
4. Wire cutters: to cut and trim wires or metal components, facilitating repairs and adjustments.
5. Jeweler's screwdriver set: to allow for precise handling of small screws commonly found in bracelet clasps and links.
6. Bead reamer: to enlarge or smooth bead holes for the replacement or adjustment of beads.
7. Bracelet gauge: to measure bracelet length accurately.
8. Jeweler's hammer: to allow controlled force for shaping and adjusting metal components without causing damage.
Materials:
1. Replacement clasps: to replace damaged or broken clasps, ensuring secure closure.
2. Jump rings: to connect various components, such as charms or links.
3. Stretch cord or wire: to re-string beads or elastic bracelets.
4. Crimp beads: to secure the ends of wires or cords, preventing beads from slipping off.
5. Jewelry glue: to bond and reinforce connections, especially for non-mechanical repairs like securing stones or beads.
6. Bracelet extender links: to provide a simple solution for lengthening bracelets and enhancing wearability.
7. Assorted beads or charms: to enable customization and replacement of missing or damaged decorative elements.
8. Jewelry cleaning cloth: to polish and clean the repaired bracelet, preventing tarnish.
Now that you have the essential tools and materials, let's delve into a step-by-step guide to fix a broken chain, clasp, and string.

How to fix a broken bracelet chain:
Step 1: Examine the broken chain section to identify the damaged link. And ensure you have needle-nose pliers and replacement jump rings.
Step 2: Use needle-nose pliers to gently open the broken link without distorting its shape.
Step 3: Select a matching replacement jump ring and connect it to the opened link. Ensure a snug fit and then close the link using the pliers.
Step 4: Wear the bracelet and test the repaired chain for durability.
How to fix a broken bracelet clasp:
Step 1: Inspect the broken clasp and gather tools like jeweler's screwdrivers, replacement clasp, and jump rings.
Step 2: Carefully remove the irreparable clasp and ensure the surrounding bracelet remains intact.
Step 3: Use jump rings that match the original in style and size to attach the new clasp securely to each end of the bracelet.
Step 4: Test the new clasp by fastening and unfastening it. Ensure a secure closure and smooth operation.
How to fix a broken bracelet string:
Step 1: Examine the bracelet string to locate the breakage and prepare replacement string, a beading needle, and clear jewelry glue on hand. (Or a bead bracelet repair kit instead)
Step 2: Carefully remove the damaged string from the beads or components. Take note of the original stringing pattern.
Step 3: Use a beading needle to thread the replacement string through the beads, following the original pattern. Ensure a snug fit, leaving no gaps.
Step 4: Tie secure knots at both ends of the bracelet, ensuring the beads are tightly held. Apply a small amount of clear jewelry glue to reinforce the knots.
Step 5: Allow the glue to dry completely, then test the bracelet for strength and flexibility. Make any adjustments as needed.
Prevention is often the best cure, and caring for your bracelet can significantly extend its lifespan. Here are some tips for caring for your bracelet:

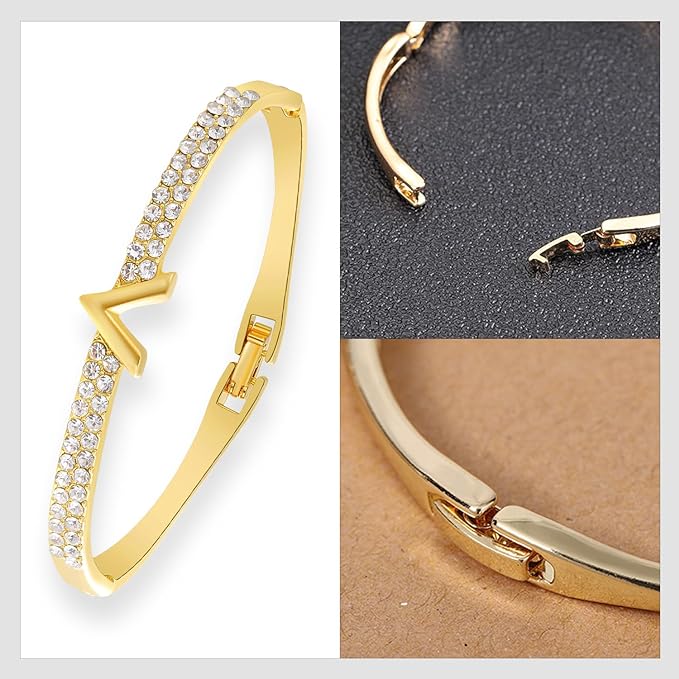
l Proper Storage: Store your bracelets in a dedicated jewelry box or organizer with individual compartments to prevent tangling and scratching. Or buy bracelets with gift boxes, like the LENDPLEX 14K Gold Plated Cubic Zirconia Classic Nail V Snake Infinity Knot Bracelet. It comes with a premium box for storage.
l Avoid Exposure to Harsh Chemicals: Remove your bracelet when using cleaning products, swimming in chlorinated water, or applying lotions and perfumes. Chemicals can corrode the material or cause discoloration.
l Avoid Sunshine and Heat: Keep the bracelet in a cool, dry place to prevent color distortion of gemstones. Or get a color-proof bracelet, like the LENDPLEX bracelet made of hypoallergenic brass with a long-lasting 14K gold finish.
l Regular Cleaning: Gently clean your copper bracelet with a soft, lint-free cloth to remove any oils, sweat, or dirt that can accumulate over time. Avoid using harsh chemicals or abrasive materials that can damage the bracelet.
l Avoid Overstretching: If your bracelet is elastic or adjustable, be careful not to overstretch it. Overstretching can weaken the material and lead to breaks.
How to fix a broken bracelet is a skill worth mastering. Armed with the right tools, materials, and techniques, you will regain your bracelets and enjoy it for years. Remember, a well-maintained bracelet complements your style and becomes a cherished accessory with sentimental value.
Repair costs for a broken bracelet range from $20 to $50 for basic fixes like clasp replacements or chain adjustments. The price can increase with more severe damage and depending on the jeweler's rates. For a cost-effective solution, consider DIY repair methods mentioned earlier in this article.
While super glue may provide a temporary fix for a broken bracelet, it's not recommended for long-term repairs. Super glue can damage jewelry, create a messy appearance, and may not provide a secure and lasting solution. Professional jewelry repair is advised for a more reliable and aesthetically pleasing result.
Yes, you can repair a broken elastic stretch bracelet by restringing it. Purchase a new elastic cord and re-thread the beads, tying secure knots at each end. Ensure the knots are tight, and consider applying clear jewelry glue for added reinforcement. This DIY approach allows for a simple and cost-effective repair.
This article unveils how to make rainbow loom bracelets effortlessly. Read on and the detailed tutorial is perfect for beginners and seasoned crafters alike.
Read MoreWondering what is a bolo bracelet? Learn its meaning, origin, styles, recommendations, and tips to wear and care for in this ultimate guide.
Read MoreAre you still confused about how to make a leather bracelet? Read on and explore techniques, tools, materials, and tips for creating timeless accessories.
Read MoreLearn how to organize earrings and what to use at home or for travel to save your accessories with this guide. Discover the art of earring organization!
Read More