


Clay bead bracelets not only are unique and stylish accessories to wear but also offer a fulfilling DIY experience. They are perfect for stacking, mixing, and matching with other bracelets to create a layered look that is currently trending in fashion circles. If you've ever admired these beautiful creations and wondered how to make your own, you're in the right place.
In this article, we'll walk you through the whole process of creating your own clay bead bracelet. From selecting the right materials and designing a pattern to the detailed steps of threading and how to tie a clay bead bracelet to finish off, we cover everything you need to know to create a beautiful and durable piece.
Clay bead bracelets are a popular choice for those who love unique, handcrafted jewelry. Made from small beads shaped from clay, these bracelets offer a touch of earthy, rustic charm. The clay used can range from air-dry clay found in craft stores to high-quality polymer clays that can be baked to a hard, durable finish.
One of the best things about clay bead bracelets is their versatility. They can be crafted in various colors, patterns, and sizes, allowing for a high degree of customization. Whether you prefer a bold, vibrant look or something more subdued and natural, there's a style for everyone.
Before we delve into the steps of stringing and how to close a clay bead bracelet, it's essential to gather all the necessary materials. Here's what you'll need:
You may also consider using a clay bead bracelet kit to help you achieve your desired design and simplify the process.
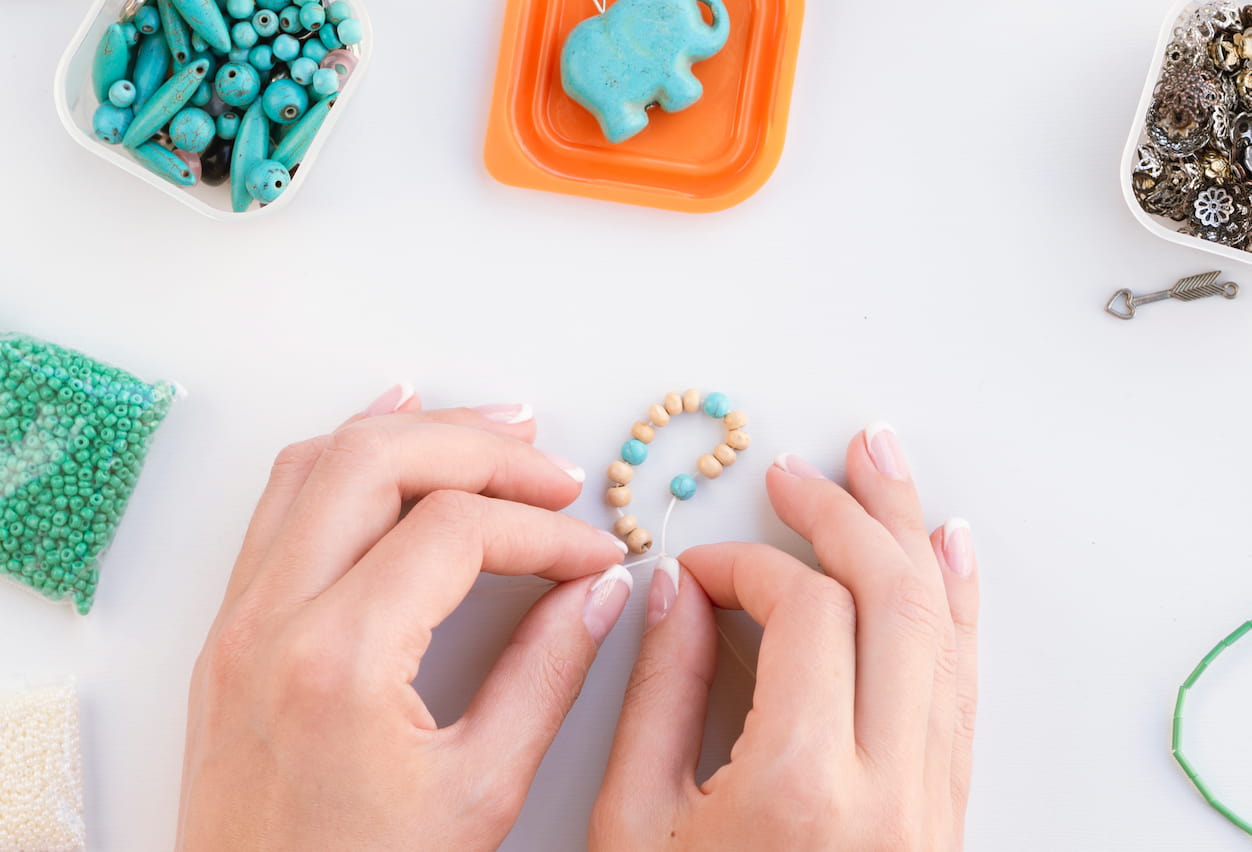
Crafting your own clay bead bracelet can be a fun and rewarding DIY project. Follow these detailed steps on how to string and how to finish a clay bead bracelet to ensure your piece turns out beautifully and holds up over time.
If you are wondering how to start a clay bead bracelet, begin by measuring your wrist to determine the length you need. It's crucial to add an extra 1 to 2 inches to this measurement to account for the tying of knots.
Take a piece of elastic cord or linen thread and cut it slightly longer than the length you've measured. This precaution allows you room to adjust if needed.
Arrange your clay beads in the order or pattern you desire. This preparation not only aids in visualizing the final product but also ensures that the design flows smoothly as you thread.
If you're using a non-elastic string, consider attaching a small piece of tape at one end to prevent the beads from slipping off as you work. For elastic strings, a simple knot will suffice to hold the beads in place temporarily.
If using a beading needle, thread it first to make the process easier. Begin threading by inserting the cord into your first bead. Continue adding beads according to your prepared design until you reach the desired length.
Before securing the ends, wrap the bracelet around your wrist to make sure it fits comfortably. Adjust the number of beads if necessary.
Once your piece has the correct number of beads, it's time to tie it off. If you are using elastic string, tie a surgeon's knot to ensure the bracelet stays together. For non-elastic materials, attach the clasp using crimp beads or a secure knot.
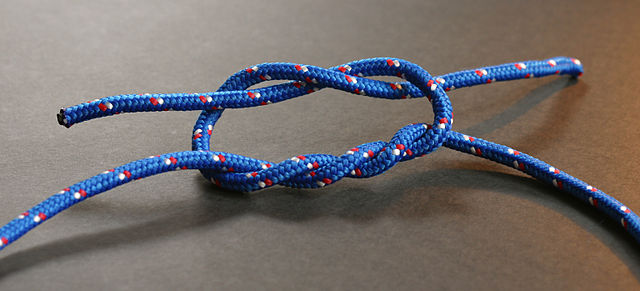
A surgeon's knot is best way to tie clay bead bracelets because it is more secure than a simple overhand knot and less likely to slip. Here's how to tie off a clay bead bracelet with a surgeon's knot:
1.Hold the ends of your stringing material after you have threaded all your beads onto it.
2.Tie a regular overhand knot but before tightening it, pass the end of the string through the loop again to make a double loop. Pull both ends to tighten the knot.
3.Make another overhand knot on top of the existing double-looped knot.
For added security, place a small dab of glue on the knot (especially for elastic strings). This step will prevent the knot from coming loose and the bracelet from unraveling.
Once the glue has dried, trim any excess stringing material close to the knot to keep your finish neat and tidy.
Clay bead bracelets offer a fantastic playground for creativity, with numerous popular designs and styles that cater to various tastes and fashion statements. Here are some popular clay bead bracelet ideas and designs:

Creating clay bead bracelets is not only a fun activity but also an art that you can constantly improve upon. Here are some helpful tips and tricks to enhance your bracelet-making experience:
Now that we've walked through the essentials of making clay bead bracelets, including a step-by-step guide on how to tie a clay bead bracelet, you're well-equipped to start your crafting journey. Experiment with different designs and styles to truly make each piece your own. Remember, the tips and tricks we discussed can greatly enhance your bracelet-making experience, helping you avoid common pitfalls and achieve professional results. Embrace your creativity and let your new skills shine through each unique bracelet you create.
Elastic cords are one of the most popular choices for clay bead bracelets because they allow for easy wearing and removal of the bracelet without needing a clasp. These cords come in various thicknesses and can be selected based on the hole size of your beads and the overall desired strength.
Yes, clay bracelets can get wet, but it's important to understand the implications. If the clay beads are not properly sealed, they can absorb water and potentially wear down or change color over time. Water exposure can also weaken the string, especially if it's made of a natural fiber like cotton. To extend the life of your clay bead bracelet, it's advisable to remove it before engaging in activities like swimming, showering, or any other situation where it might remain in water for extended periods.
The number of flat clay beads needed to make a bracelet depends primarily on the size of your wrist and the diameter of the beads themselves. A general rule of thumb for standard-sized flat clay beads (which typically measure about 6mm in diameter) is to use between 30 to 40 beads for an average adult bracelet. For those 1mm small clay beads, you'll need about 120-150 pieces for an adult-sized bracelet.

Wondering "What color jewelry should I wear?" Learn how to select jewelry color based on your skin undertone, outfit choice, and seasonal trends here.
Read More
Discover how to clean stainless steel jewelry effectively. Learn about its properties, 3 easy cleaning methods with step-by-step guides, and maintenance tips.
Read More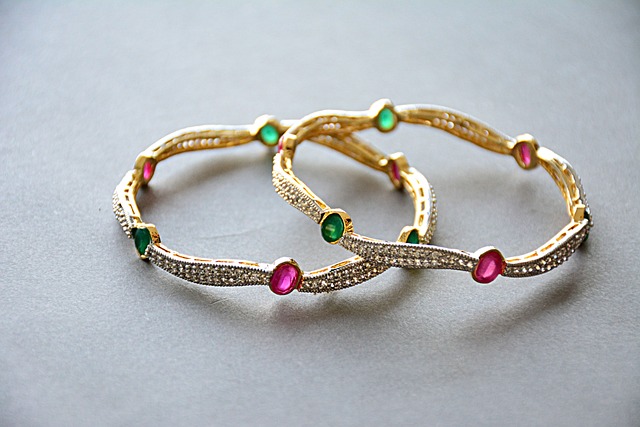
Learn how to clean brass jewelry effectively with these 5 methods. Get tips on how often to clean and store your brass jewelry properly to keep it sparkling.
Read More
Learn how to clean copper jewelry with 7 easy methods. Discover frequency, storage, and care tips to keep your copper pieces shining bright with our guide.
Read More