Jewelry is more than just an accessory—it holds memories, sentiments, and value. But what happens when your favorite piece breaks or shows signs of wear? While some situations require professional care, there are plenty of ways you can learn how to repair jewelry at home with a little patience and a few tools. Below, we outline six common jewelry repairs you can tackle yourself, complete with step-by-step instructions.
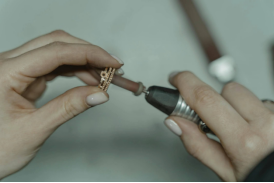
Accidents happen, and jewelry can break or wear out over time. But what do you do when this happens—throw it away or tuck it aside, never to be worn again? These aren’t the best solutions. For many minor issues, you can easily repair your jewelry yourself. In this section, we’ll walk you through six simple methods on how to fix jewelry, saving you time, money, and the sentimental value of your precious pieces.
A broken clasp can render a necklace or bracelet unusable, but fixing it is simpler than you think. Here is a simple step-by-step guide:
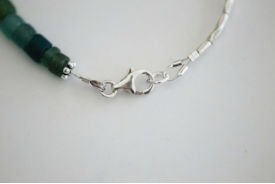
1.Prepare Supplies and Tools Needed: Replacement clasp, jump rings, needle-nose pliers, small scissors, and crimping tool.
2.Assess the Damage: Begin by inspecting both the clasp and the jump ring for signs of wear. Common issues include deformed jump rings that can't secure the clasp or a malfunctioning clasp arm.
3.Open the Jump Ring or Clasp: You may carefully use pliers or small scissors to open the jump ring or clasp. Take extra care, as metals like gold and silver can be easily bent or deformed.
4.Replace the Old Clasp: Then, you may remove the old clasp and check the condition of the jump ring. If the jump ring is still intact, reuse it; otherwise, replace it with a new one.
5.Attach the New One: After replacing, you can secure the chain to the new clasp by attaching it to the jump ring. In this part, you should ensure the chain is firmly connected, and the jump ring is closed tightly. If there's a gap in the link, use pliers to gently crimp it back together, securing the chain.
6.Polish the Metal and Finish: Finally, you can polish the metal with a soft cloth to remove any tool marks and restore the shine of your repaired jewelry.
Rope chains are elegant yet prone to tangling and breaking. Restoring them requires careful handling. Here are 8 steps to walk you through the process:
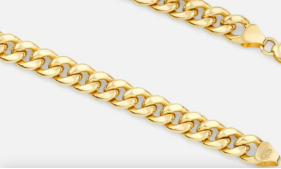
1.Gather Tools You Need: Soldering iron, flux, solder, pliers, magnifying glass, cleaning solution, polishing cloth.
2.Identify Areas Requiring Repair: First, you may inspect the necklace carefully, focusing on broken or bent links. Common issues include links that are twisted or disconnected. If a link is cracked, it may need to be replaced entirely, while small breakages can be soldered.
3.Clean the Broken Ends: Don't miss this step! A cleaning solution can remove any dirt, oxidation, or old solder. This ensures the new solder will adhere properly and create a strong bond.
4.Handle the Necklace (Especially if Gold): If working with a soft metal like gold, ensure you handle the chain gently to avoid further bending or weakening. You may use pliers to hold the chain in place without over-gripping, which could cause additional damage.
5.Apply Flux: Then, you can apply flux to the area where the chain is broken. Flux helps the solder flow more easily and prevents oxidation. It also ensures the joint is clean for better adhesion.
6.Align the Ends: Align the broken ends of the chain carefully. Make sure the links are positioned exactly as they were before they broke, so the repair is seamless and the chain retains its original form.
7.Solder the Joint: Now, you should master the soldering technique. You may use a soldering iron to heat the joint and melt the solder onto the broken ends. Be precise, ensuring that the solder fills the gaps fully without spilling over to other links.
8.Cool and Clean: Allow the repair to cool completely before cleaning any remaining flux. Finally, you may use a polishing cloth to gently restore the necklace’s shine and remove any solder residue, ensuring a smooth and polished finish.
Losing a stone from your jewelry can be disheartening, but unlike a broken rope chain, repairing a missing stone is relatively simple. Here’s how you can restore your piece with ease.
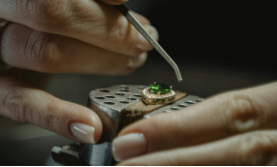
1.Prepare Tools and Supplies: Replacement stone, jewelry glue, tweezers, magnifying glass, small pliers, and jewelry adhesive.
2.Identify the Damage: Check if only the stone is missing or if the setting is also damaged. Sometimes, a stone may fall out due to a loose setting, or the prongs may have bent or broken, causing the stone to fall out. If the setting is damaged, you may need to reshape or replace it before placing a new stone. If the stone was lost due to handling, ensure there’s no underlying issue with the setting that could cause it to fall out again.
3.Find a Replacement Stone: If you fix jewelry for the genuine stone, you can choose a replacement stone that matches the original in size, shape, and color. If you just repair costume jewelry, you can find a stone that closely resembles the original at most craft stores or online.
4.Clean the Setting: You may use a cleaning solution to remove any dirt, old adhesive, or residue from the stone setting. This will ensure the new stone adheres properly and securely.
5.Prepare the New Stone: After cleaning, you may gently apply a small amount of jewelry adhesive to the back of the replacement stone. Be careful not to overapply the glue, as excess can spill out when the stone is set.
6.Place the Stone in the Setting: Using tweezers, you may carefully position the new stone into the setting. Remember to ensure it sits evenly and securely within the prongs or bezel.
7.Allow the Adhesive to Dry: Let the glue dry completely, as improper curing can cause the stone to loosen or fall out. This process should leave the piece undisturbed for several hours.
8.Polish and Check: After the stone has been set, polish the jewelry with a soft cloth. Check the stone's security by gently testing if it’s firmly in place, making sure it's properly aligned and fixed.
Fixing an elastic bracelet can be straightforward with the right materials. You’ll need a new elastic cord, beads, crimp beads, a needle, pliers, scissors, a clasp (optional), and spacer beads. Here are five methods to restore its function and style.

1.Restring with New Cord if Inelastic: If the elastic has lost its stretch, remove the old cord and replace it with a new one. You need to measure the cord to fit your wrist and string it through the beads, making sure to thread each bead securely. Use a needle for tighter bead holes if necessary.
2.Re-Knot the Bracelets if Loose: For a loose bracelet, remove several beads and re-knot it tightly. You can tie a secure knot at each end, leaving about 1-2 inches of cord to make a tight, reliable knot. The knot should be tightly secured and trim any excess.
3.Reinforce with Wire or Thread: If the bracelet undergoes frequent wear and stress, reinforce the knot by wrapping a small piece of wire or durable nylon thread around it. To reinforce the knot, you may cut a small piece of wire or strong nylon thread, about 3-4 inches long. Then carefully wrap it tightly around the knot several times to add strength. Lastly, you may use pliers to secure the ends and ensure the knot is firmly held in place, preventing it from loosening.
4.Add Spacer Beads for Strain Reduction: To prevent the elastic from snapping under pressure, add small spacer beads between the larger ones. These beads help distribute the strain evenly across the cord, reducing the risk of breakage. To add spacer beads, slide a small bead onto the elastic cord between the larger beads before continuing to string the rest. They should fit snugly but not tightly, allowing the elastic to stretch comfortably without causing undue pressure on any one section.
5.Custom Clasp or Closure: To add a custom clasp, first measure the ends of your bracelet to determine the appropriate length for the clasp. Then you may use crimp beads to secure each end of the elastic cord to the clasp's loop; and use pliers to flatten the crimp beads tightly around the cord, ensuring the clasp is firmly attached. For added durability, apply a small amount of jewelry adhesive inside the crimp bead before securing it. Once done, check that the clasp opens and closes properly for easy wearing and removal.
A broken ring can occur in several ways, with common issues including cuts, bends, or loose stones. Repair techniques for diamond and gemstone rings are similar to those for fixing a missing stone. In this section, we will focus on how to repair a cut and bent ring.
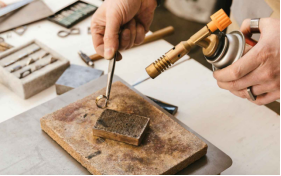
1.Repair a Cut Ring: A cut ring can often be repaired at home if the damage is minor. Clean first! You may wipe the ring with warm, soapy water and a soft brush. For a minor cut, carefully heat the metal with a jeweler’s torch to soften it. Then, apply the right solder for the metal type to fuse the cut back together. Once the metal fuses, polish the ring to smooth any rough edges and restore its shine.
2.Repair a Bent Ring: If your ring is bent, start by assessing the extent of the damage. You may use a mandrel or a tapered metal rod, and slide the ring onto it. Then gently hammer the ring with a rawhide mallet, applying steady, even pressure. This reshapes the ring without damaging it. After the reshaping, inspect for cracks. If cracks are found, solder them before polishing the ring.
Gold jewelry is undeniably elegant, but its delicate nature can make it prone to damage over time. Small bends or minor breaks can often be repaired at home with gentle manipulation, especially for lower-karat gold (10k or 14k). However, for higher-karat gold (18k and above), or if you're dealing with intricate designs or gemstones, it’s better to seek professional help. Before you begin any repair work, always clean the gold thoroughly and soak it in a pickling solution to eliminate any dirt or oxidation, ensuring a smooth repair process. With this in mind, let’s look at 3 common methods for repairing gold jewelry.
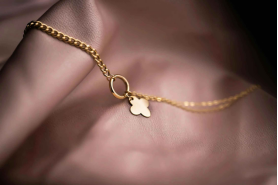
1.Fix the Pieces: If a piece of your gold jewelry has broken into smaller parts, start by carefully assessing the damage. For small cracks or gaps, use a jeweler's solder and a torch to heat the metal and fuse the pieces together. After the solder has cooled, smooth out any excess solder and polish the area to restore its shine. Be gentle during this process to avoid causing further damage.
2.Repair the Bent Gold: To repair a bent gold piece, begin by cleaning it with soapy water and a soft cloth. Then you may gently reshape the metal by hand or using pliers, ensuring the bend is gradual and not too forceful. For more severe bends, it may be necessary to use a mandrel and a soft mallet. For high-karat gold, be extra cautious as it can be more prone to cracking. Once reshaped, polish the jewelry to remove any marks or imperfections.
3.Repair the Hook or Clasp: When repairing a broken hook or clasp on gold jewelry, take care to match the original design and strength of the piece. As with previous clasp repairs, you may use small pliers to open the clasp or jump ring gradually. After aligning the ends, close it with careful pressure. For gold, ensure the clasp is securely attached to prevent any future damage. Gold is softer than other metals, so be gentle when applying pressure to avoid deforming the clasp.
While DIY repairs can be effective for minor issues, certain situations call for professional assistance. For example, if the piece is made from high-karat gold (18k or higher), platinum, or contains valuable gemstones, attempting a repair at home can lead to further damage. Similarly, intricate designs with delicate settings, like those found in vintage or heirloom pieces, require the expertise of a skilled jeweler to preserve their structural integrity and value. If a repair involves complex tasks like resizing rings or re-setting stones, it’s best to trust professionals who specialize in repairing jewelry.
Knowing how to repair jewelry empowers you to restore and cherish your favorite pieces for years to come. Whether it’s a quick DIY fix or enlisting professional help, taking action ensures your jewelry stays beautiful and wearable. So, don’t let broken pieces sit in a drawer. Pick up your tools, or consult an expert, and give them the care they deserve.
You should inspect your jewelry at least once a year. This helps catch early signs of wear, such as loose stones or weakened clasps before they become significant issues.
Absolutely. Repairing your jewelry restores its functionality and sentimental value. For high-value items, repair can also be more cost-effective than replacement.
Costs vary based on the complexity of the repair and the materials involved. Simple fixes like clasp replacement may cost $20–$50, while extensive repairs for gold or gemstones can range from $100 to $500.
This jewelry collection guide highlights the 10 best jewelry box options of 2025, featuring stylish, functional picks for travel, home, and every storage need.
Read MoreThis fashion guide reveals the best necklace to wear with turtleneck outfits, including top styles, lengths, materials, and expert tips for a chic look.
Read MoreThis stylish guide highlights the best travel jewelry case for 2025, helping you keep your accessories secure, organized, and ready for every adventure.
Read MoreHow to tell if man's ring is too tight? Find the signs of a ring too tight, comfort tips, and recommended size to ensure a comfortable fit and lasting wearability.
Read More