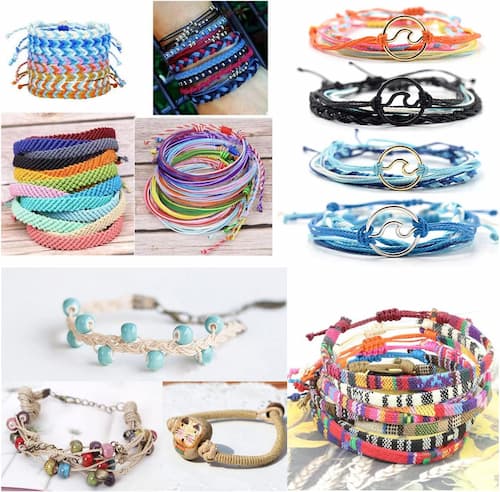
Wax cord bracelets are a stylish and versatile accessory that allows you to showcase your creativity. Crafting your own bracelet not only gives you a unique piece of jewelry but also provides a therapeutic and rewarding experience.
In this comprehensive guide, we will take you through everything you need to know about how to make a wax cord bracelet, from essential materials to step-by-step instructions and design ideas. Keep reading to learn more!

Wax cord bracelets are popular jewelry items crafted from waxed cotton or polyester cords, providing strength and water resistance. The wax coating enhances durability and imparts a polished finish, contributing to their appeal for their simplicity and bohemian aesthetic. These bracelets often showcase knotting techniques like macramé and may include beads or charms for personalization.
Featuring sliding knots for easy adjustment and a wide color variety, they are customizable to fit different wrist sizes. Their water-resistant nature makes them suitable for activities like swimming. Wax cord bracelets are often handmade in a DIY fashion, allowing individuals to express themselves through personalized designs.
Symbolism and meaning are frequently attached to these bracelets, with colors or charms representing aspects of one's life. Affordable and versatile, wax cord bracelets are accessible to various individuals, serving as both fashionable accessories and thoughtful gifts.
Before learning how to make adjustable waxed cord bracelet, you will need a few essential materials. Here's a basic list:
Wax Cord: Select a wax cord of your choice. Common options include cotton, linen, or nylon cords treated with wax for added strength.
Scissors: A sharp pair of scissors is essential for cutting the wax cord to your desired length.
Clasps: Choose a clasp that complements your design. Lobster clasps, toggle clasps, or magnetic clasps work well for wax cord bracelets.
Tape Measure: Use a tape measure to ensure accurate sizing for your bracelet.
Optional materials:
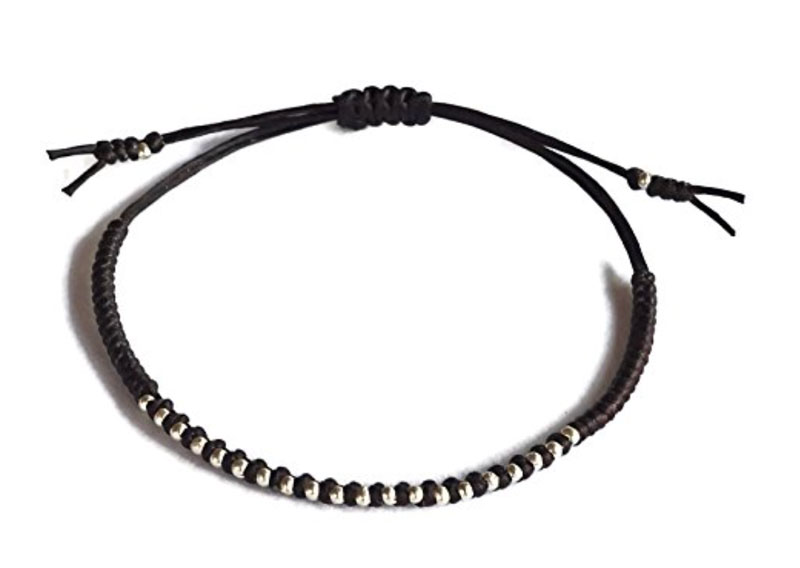
If you are seeking a unique and meaningful gift, the "SabanNga Sterling Silver Wax Cord Bracelet" presents an exquisite option. This 925 silver bracelet combines high-quality, natural materials with meticulous craftsmanship.
Designed by SabanNga, each bracelet is 100% handmade using natural materials, making it a unique and meaningful piece of jewelry. The silver beads add a chic and fashionable touch, perfect for any occasion. With an adjustable size of 8 to 10 inches, it suits various wrist sizes comfortably. Ideal as a charm bracelet, gift bracelet, or personalized gift, this versatile accessory is perfect for Christmas gifts or any special occasion.

Having prepared all the tools and materials, here's a step-by-step tutorial to guide you through the process on how to make a bracelet with waxed cord:
Step 1: Measure and Cut
Measure the wax cord to the desired length, considering the size of your wrist and the type of bracelet you want to create. Use scissors to cut the cord.
Step 2: Add Beads (Optional)
If you've chosen to include beads, thread them onto the wax cord before starting the knotting process. Experiment with different bead placements for a unique look.
Step 3: Create a Starting Knot
Tie a basic knot at one end of your cord to prevent beads from slipping off (if using beads). Leave a small tail which you can later tuck in or trim.
Step 4: Begin Braiding
Divide the wax cord into two equal sections. Begin braiding by crossing the right section over the left and pulling it through the loop created by the left section. Repeat until you reach the desired length.
Step 5: Finish with a Knot
Once you've achieved the desired length, secure your bracelet with a knot. Trim any excess cord, leaving enough to tie a finishing knot.
Step 6: Attach the Clasp
Attach the chosen clasp to each end of the bracelet using jump rings. Ensure a secure connection by closing the jump rings tightly.
Step 7: Secure Knots (Optional)
For added durability, you can use jewelry glue to secure the knots. Apply a small amount of glue to the knots and let it dry completely.
Your waxed cord bracelet is now complete! Put it on, show off your handmade creation, and enjoy the personalized accessory you've crafted.
Now that you've mastered the basics, let your creativity flow with these design ideas and customization tips:
Learning how to make a wax cord bracelet is a fulfilling and enjoyable experience. Whether you're a beginner or an experienced crafter, the versatility of wax cord allows you to create a piece of jewelry that reflects your individuality. Experiment with different designs, colors, and materials to craft bracelets that suit your style and make a statement.
Yes, you can enhance your bracelet by threading beads onto the wax cord during the braiding process. Experiment with bead placement and patterns for a personalized touch.
Absolutely! Mixing wax cord colors adds depth and visual interest to your bracelet. Feel free to experiment with various color combinations to create a unique and eye-catching design.
The square knot is commonly used for wax cord bracelets due to its simplicity and reliability. It keeps the bracelet secure while allowing for easy adjustments. Experiment with different knots to find the one that suits your design and preferences.
This article offers a detailed guide on how to make clay bead bracelets, covering materials, techniques, and design ideas. Let's learn the bracelet-making art.
Read MoreLearn stunning macrame bead bracelet making with our easy-to-follow guide. Follow the 9 simple steps and master the art of macrame bead bracelet tutorial.
Read MoreDiscover the significance behind bead bracelets meaning and explore how they imbue wearers with intention, energy, and connection to the world around them.
Read MoreUnlock the art of bead loom bracelet patterns with this ultimate beginner's guide. Learn pattern varieties and techniques to unleash your creativity today!
Read More