


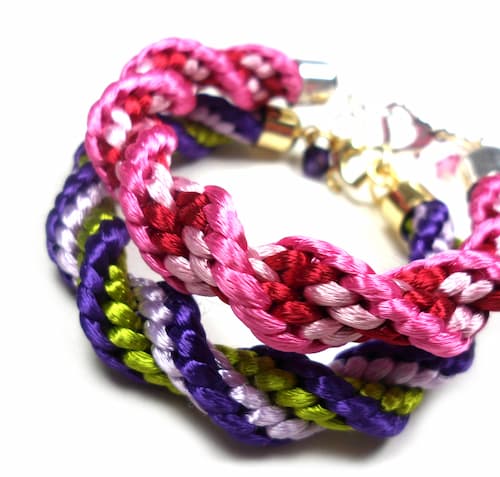
A spiral bracelet is more than just an accessory; its continuous, helical pattern symbolizes growth, evolution, and the eternal flow of life. Wearing it can represent personal journey and progress, imbuing it with deep meaning. Crafting your own spiral bracelet not only allows you to create a decorative piece but also connects you to these powerful symbols of development. In this comprehensive tutorial, we'll cover everything you need to know to become an expert maker, from the necessary supplies and detailed steps to helpful tips. Read on!
The materials you'll need may vary based on the specific design and technique you choose, but here's a basic list to get you started:
Now that all the tools and materials are ready, it’s time to learn how to make a spiral bracelet with beads or a spiral string bracelet. The detailed steps are as follows:
Step 1: Prepare for Work
Step 2: Secure Your Strings
Note: If you're using beading wire, attach the clasp using crimp beads and pliers:
Step 3: Start Knotting
Step 4: Complete the Knot
Step 5: Continue the Pattern
Step 6: Finishing the Bracelet
Following this step-by-step guide, you've learned the process of creating a unique and personalized spiral bracelet, mastering everything from preparing materials to finishing your design. If crafting isn't your style or time is short, consider the COLORFUL BLING Spiral Bracelet as an instant alternative.
Crafted from eco-friendly metal alloy and beaded elements, this versatile piece can be worn as an armband or bangle. The no-clasp design ensures easy wear and adjustability, while punk silver beads create a trendy standout effect. Perfect for any occasion, it makes an ideal gift for anyone who loves unique and distinctive accessories.

To perfect your spiral bracelet, consider these practical tips:
1.Experiment with Colors: Mix and match thread colors to create visually appealing patterns.
2.Explore Bead Varieties: Experiment with different bead shapes, sizes, and materials for a personalized touch.
3.Adjusting Size: To adjust the size of your spiral bracelet, add or reduce the number of spirals accordingly.
4.Use Quality Materials: Invest in high-quality threads and beads for a polished and durable end product.
5.Practice Consistency: Maintain consistent tension throughout the crafting process for a professional-looking result.
6.Consistent Tension: Maintain a consistent tension while creating each knot to ensure uniformity in the spiral pattern.
7.Secure Knots: Ensure each knot is tightly secured to prevent the bracelet from unraveling over time.
Crafting your own spiral bracelet is not just a creative endeavor; it's a journey into personal style and self-expression. In this article, we learned the easy way on how to make a spiral bracelet without consuming much of your time.
With a handful of materials and a bit of patience, you can create stunning accessories that reflect your unique taste. Experiment with different colors, beads, and techniques to develop your signature spiral bracelet style.
Various threads work well for spiral bracelets, including nylon, silk, and embroidery floss. Choose a thread that aligns with your desired aesthetic and comfort.
To adjust the size, simply add or reduce the number of spirals in your bracelet. Experiment with different lengths until you achieve the perfect fit for your wrist.
Absolutely! Adding beads or charms can elevate your spiral bracelet, providing a touch of elegance or personalization. Ensure even distribution for a balanced design.

Looking for how to make a protection bracelet? Find out the process with our step-by-step guide. Explore the types and significance of the protection bracelet for peace.
Read More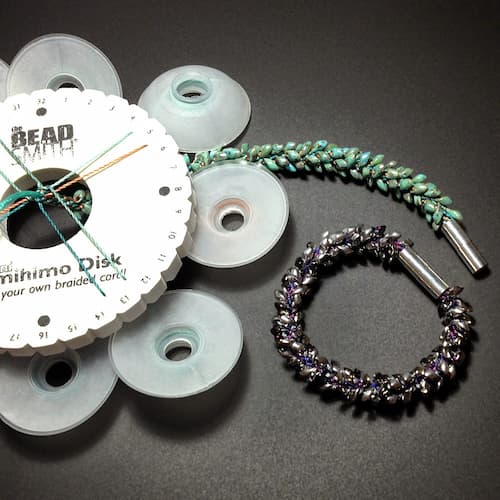
Learn how to make a kumihimo bracelet with our step-by-step guide. Discover what they are, gather materials and make stunning handmade accessories.
Read More
Learn how to make a kandi bracelet with our ultimate guide covering history, culture, materials, and a step-by-step tutorial for crafting your own.
Read More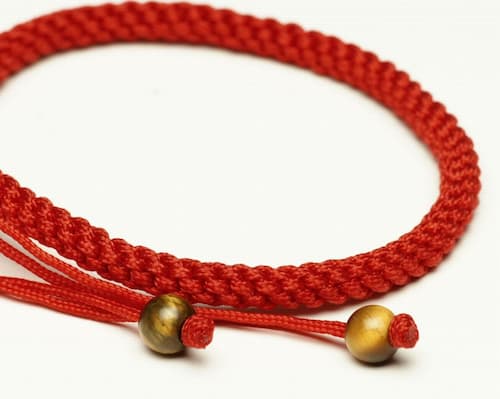
Wondering how to make a kabbalah bracelet? Learn step-by-step techniques with our comprehensive guide for crafting unique spiritual accessories.
Read More